
Building a Weather Station with a Raspberry Pi and Firebase
For some time now, I’ve wanted to build a weather station at home using a Raspberry Pi. The first project I read about with a Raspberry Pi was actually a full home weather station that a guy had built in his backyard. I remember reading about that project and thinking “man it would be awesome to do that.” Well this summer I decided to go ahead and build one myself. Over the past few weeks I’ve developed a homemade weather station that uses two Raspberry Pis. This project taught me a lot about the Internet of Things (IoT) and I got a cool weather station in the process. I also was able to incorporate Firebase into the project which made it fun.
In the next sections I’m going to briefly cover the high level of what I did, and how you can build it yourself. You can check out the source code for my weather station on GitHub here.
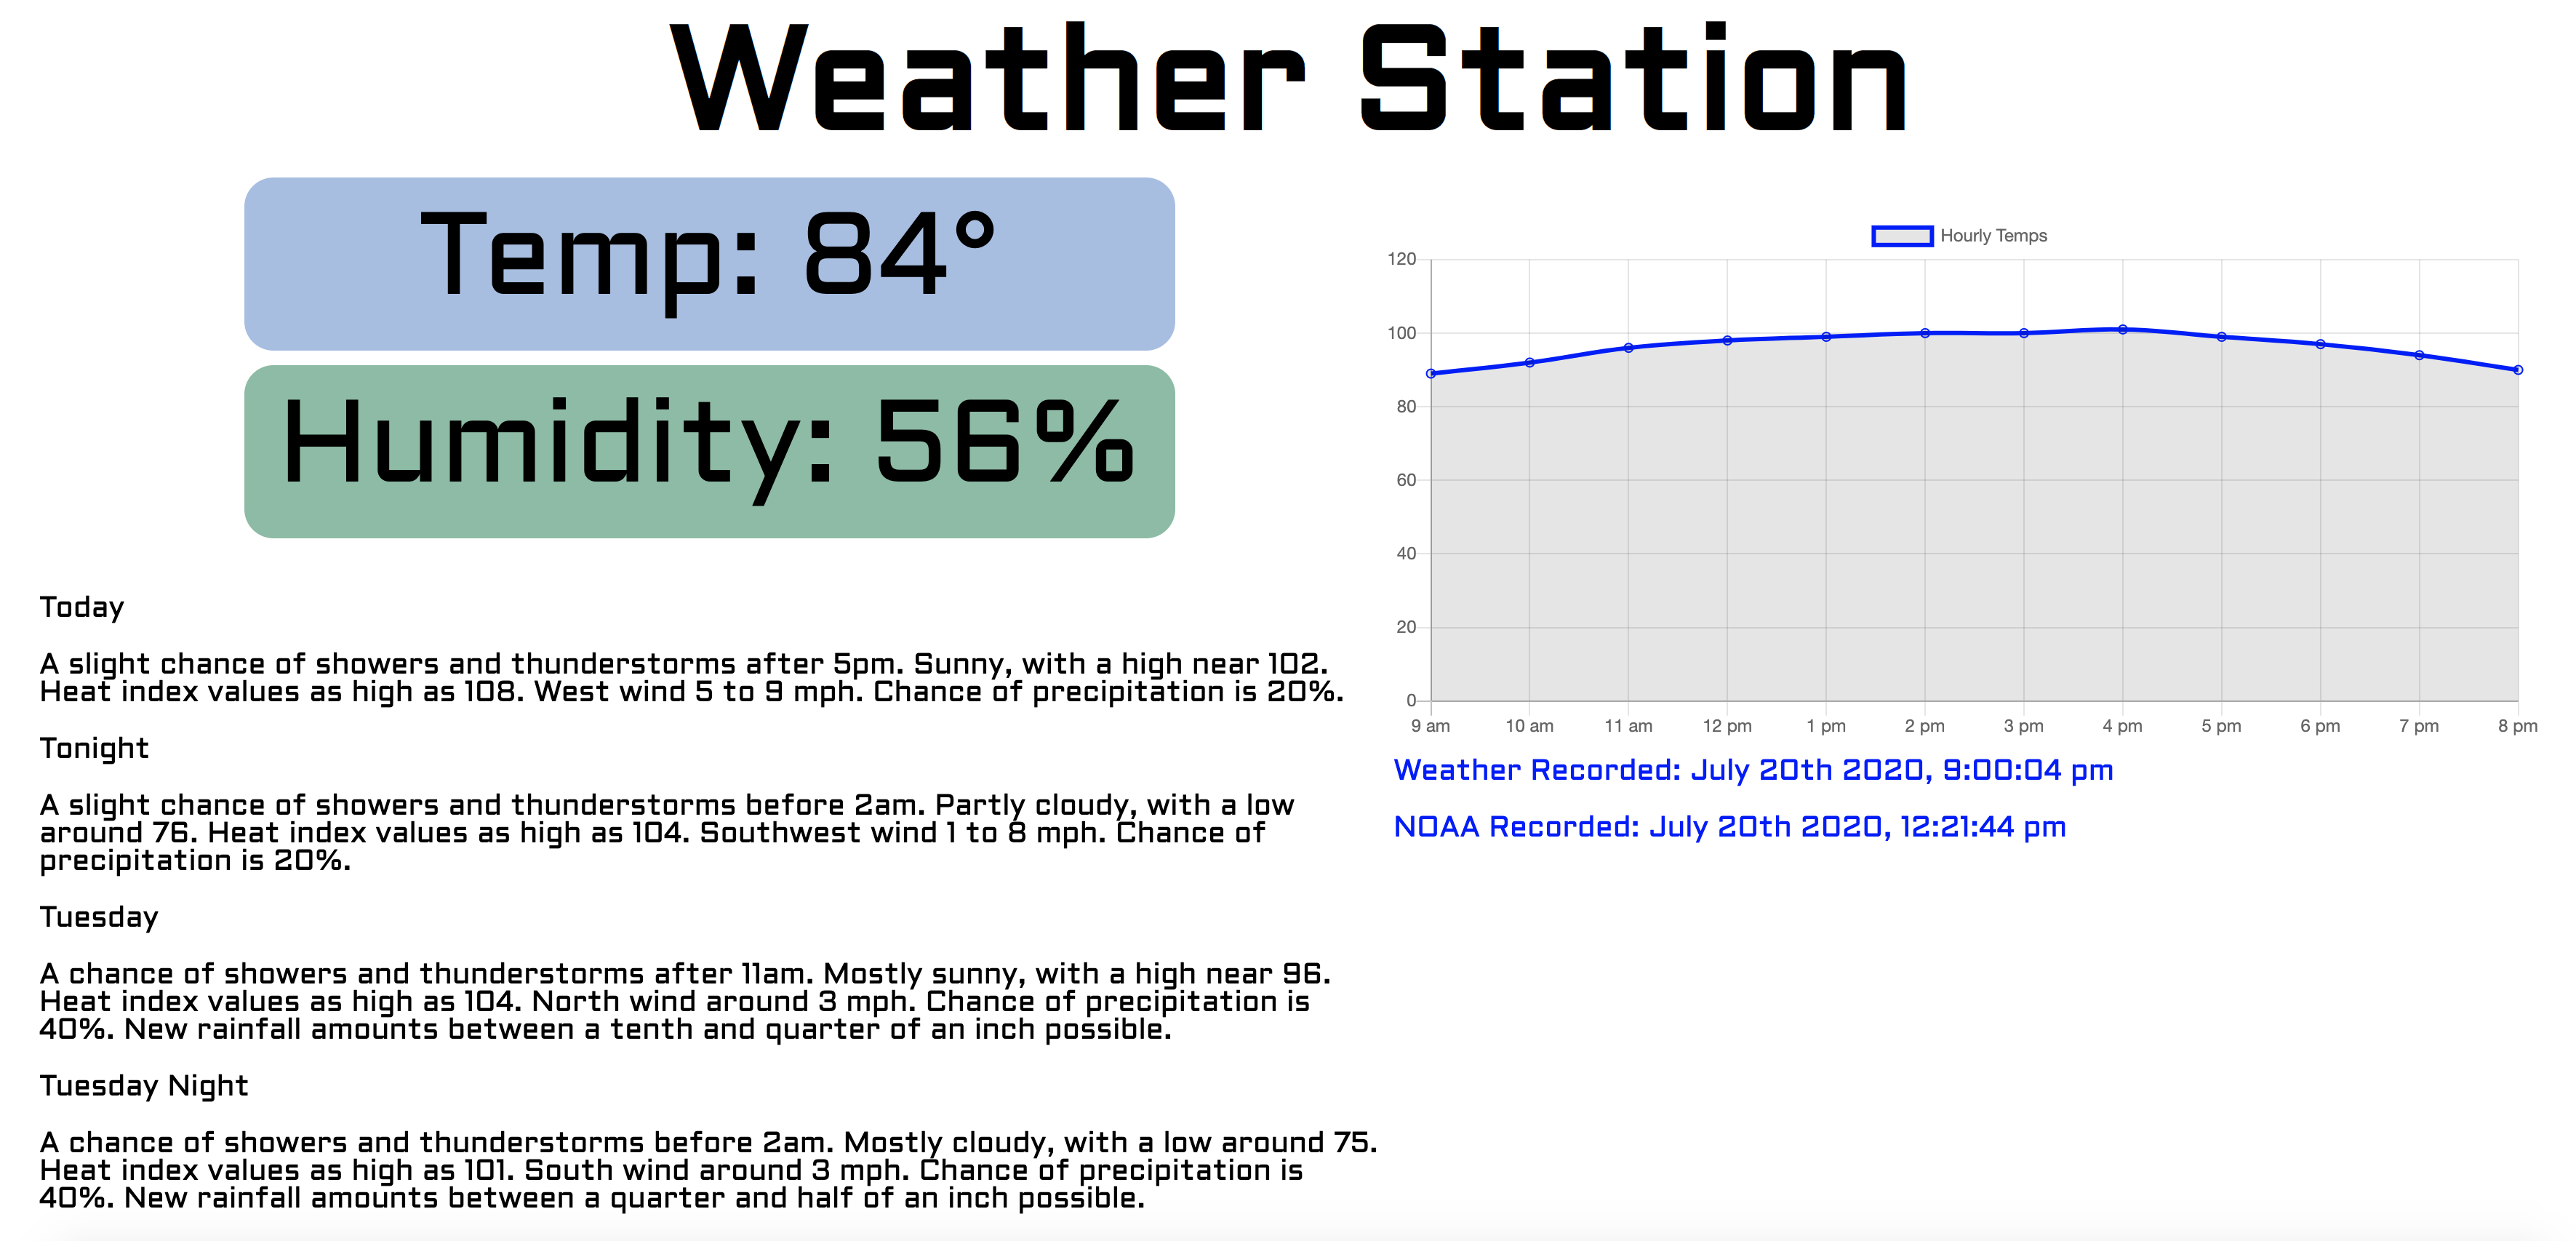
Here is my finished product:
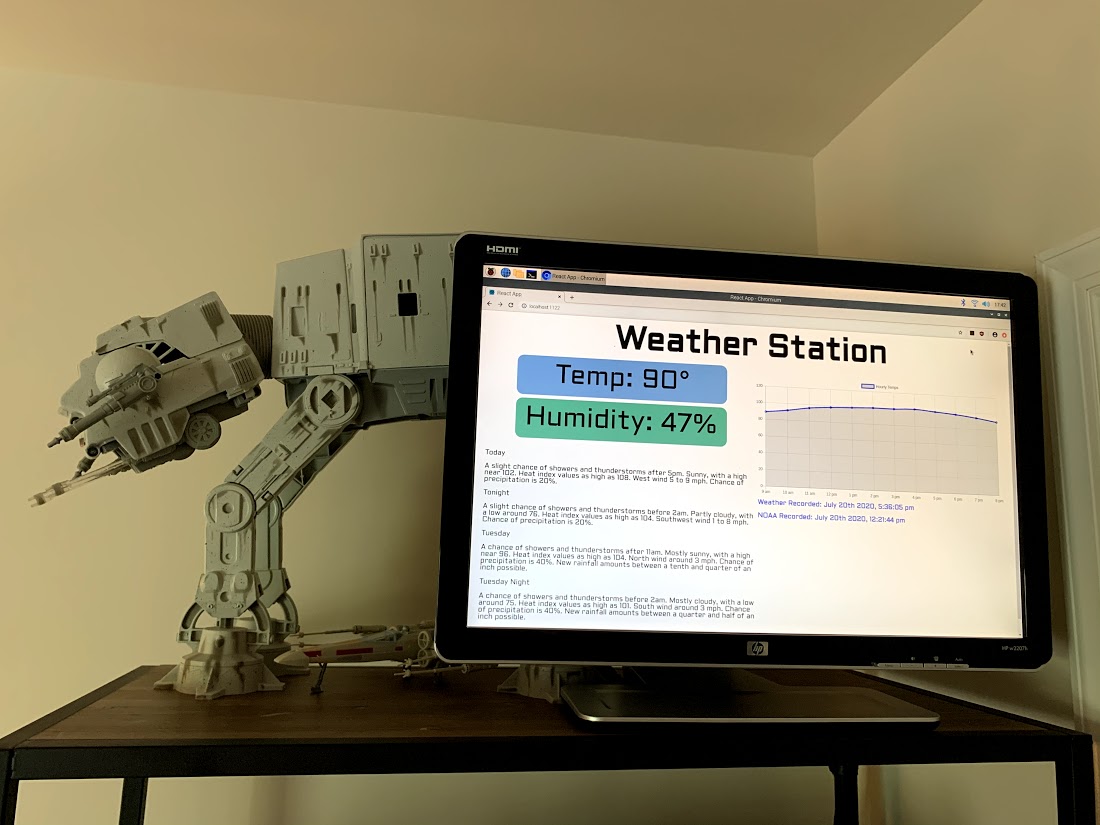
Take special note of the AT-AT protecting the weather station. He’s a special edition to our setup at home.
What is a Raspberry Pi?
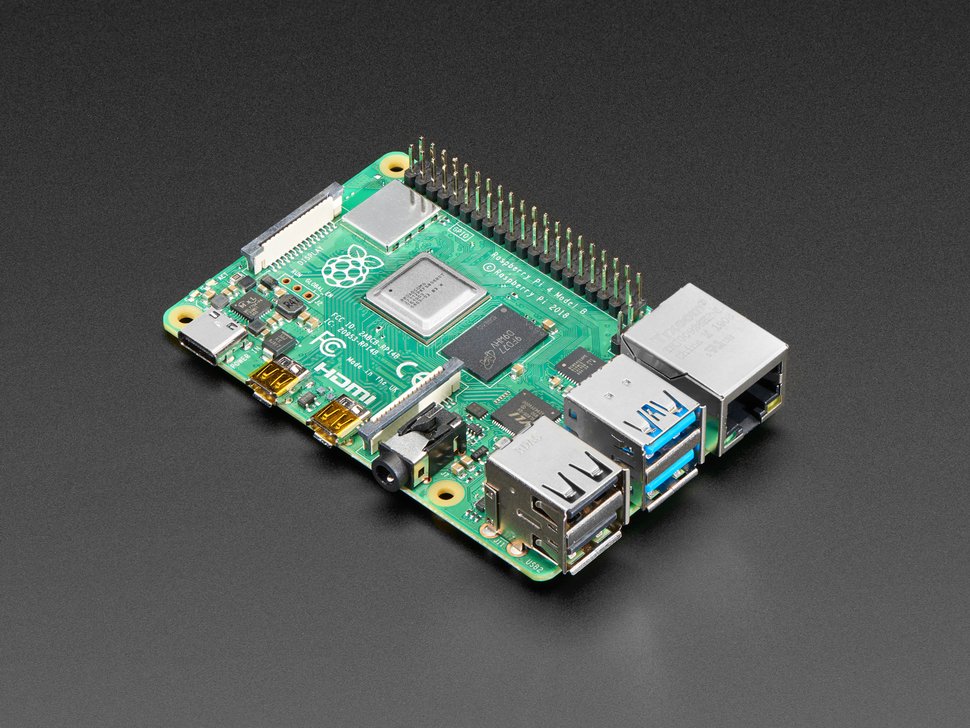
A Raspberry Pi is a mini computer that you can easily program, and even connect various peripherals for more options. They can be really fun for learning, and more generally IoT projects. Over the years the hardware has improved, and with the newest models you can even hook up HDMI monitors.
The Raspberry Pi foundation has a lot of great tutorials on their site https://www.raspberrypi.org/. There is also a great community around Raspberry Pis and hobby projects. If you’d like to learn more, check out my post here.
My Project
As I stated in the intro, I’ve been wanting to build a weather station for some time. When building a weather station there are lots of different sensors and peripherals that you could connect to the Raspberry Pi. For my weather station I decided I just wanted to know the temperature, humidity, forecast, and temperature for the next 12 hours. I incorporated a DHT11 sensor for humidity an temperature readings, and then I also used the NOAA APis to get the forecast and temperature for the next 12 hours.
When it was completed, my project used two different Raspberry Pis that communicated with Firebase. I used Firebase’s Firestore Database as a place to store the information so that the frontend could display the readings and NOAA forecast.
The actual flow looks like this:
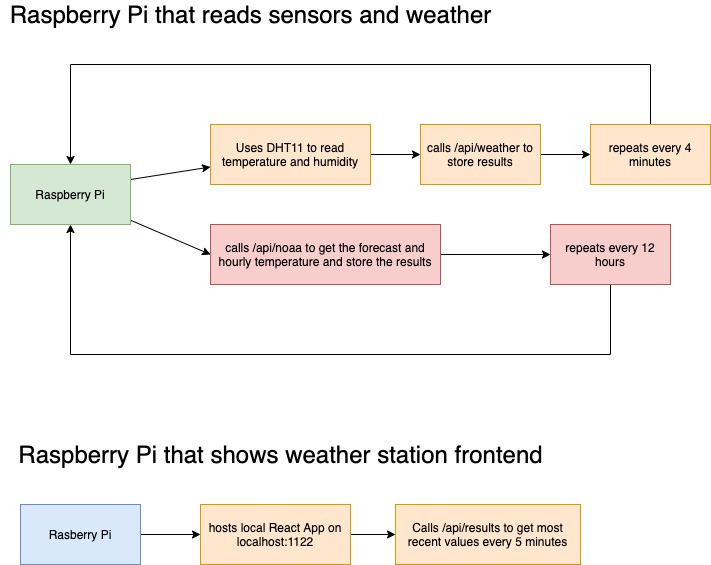
- One Raspberry Pi recorded the temperature, humidity, forecast and hourly temperatures and sent those readings to Firestore every few minutes
- A second Raspberry Pi retrieves the information saved in Firestore and displays it locally with a React app.
The Raspberry Pi that collects the temperature and humidity has two different Python scripts that run on cronjobs (1) to read the temperature and humidity and (2) to call the NOAA APIs. The results from these two Python scripts are then sent to Firestore. Both of the Python scripts that run regularly can be seen in the “sensors” folder at my GitHub project.
The second Raspberry Pi that I have in the diagram serves as basically a static frontend. You could actually have this same function with a regular computer, but I chose to use a Raspberry Pi because it was easy to hide on the shelf in my office.
The technical stack I built used the following:
- Python for interacting with the GPIO sensors on the Raspberry Pi (specifically used the Adafruit libraries and setup here)
- Node Express for running the Firebase Functions and building a basic API I could interact with (check out my post here for more detail on how to do this)
- React for the frontend that retrieves the weather information from Firestore and displays it on an computer monitor
- Firebase Firestore for holding the information as an intermediary between the two Raspberry Pis
The raw materials that I used were:
-
A computer monitor with an HDMI port
-
a wireless keyboard and mouse (only necessary for setup)
-
a DHT11 sensor to read the temperature and humidity (note there are three and four pin models, I’m using the three pin model)
-
Firebase Firestore Database (accounts for developers are free)
Please note that I chose to use a Raspberry Pi 4 and Zero W here. There are many models to choose from, and the only requirement is that they can connect to wifi and that they can also hook up to an HDMI monitor.
The way that I interacted with Firestore was by using Firebase Functions. I built a serverless API that had different endpoints for the interaction with Firestore. The API is in the Functions folder in my GitHub project. If you’d like to learn more about building APIs with Firebase, I recommend checking out my post Building an API with Firebase.
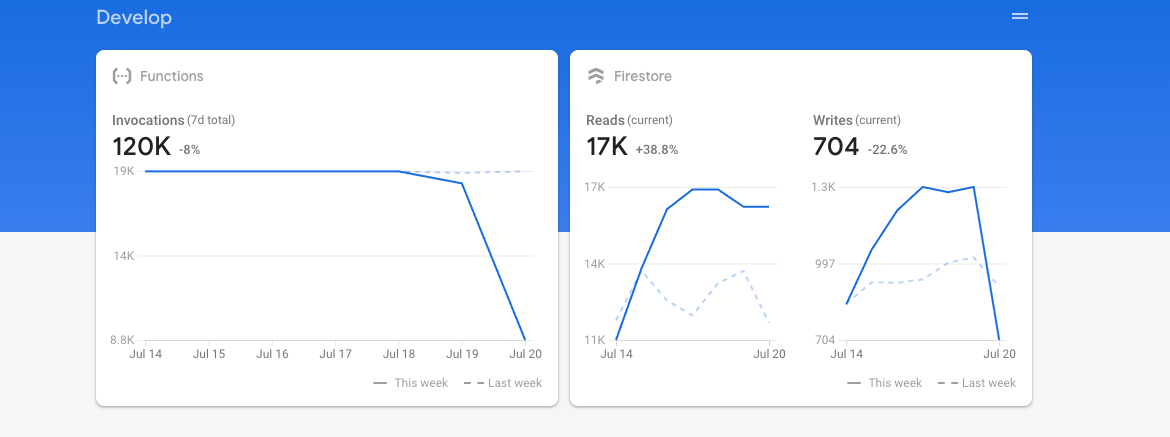
This project is a great example of how cost effective using Firebase can be. After a few weeks and thousands of reads and writes each day, it only cost $00.25!
Setting up the Sensors
The wiring for the Raspberry Pi to the DHT11 sensor is as follows:
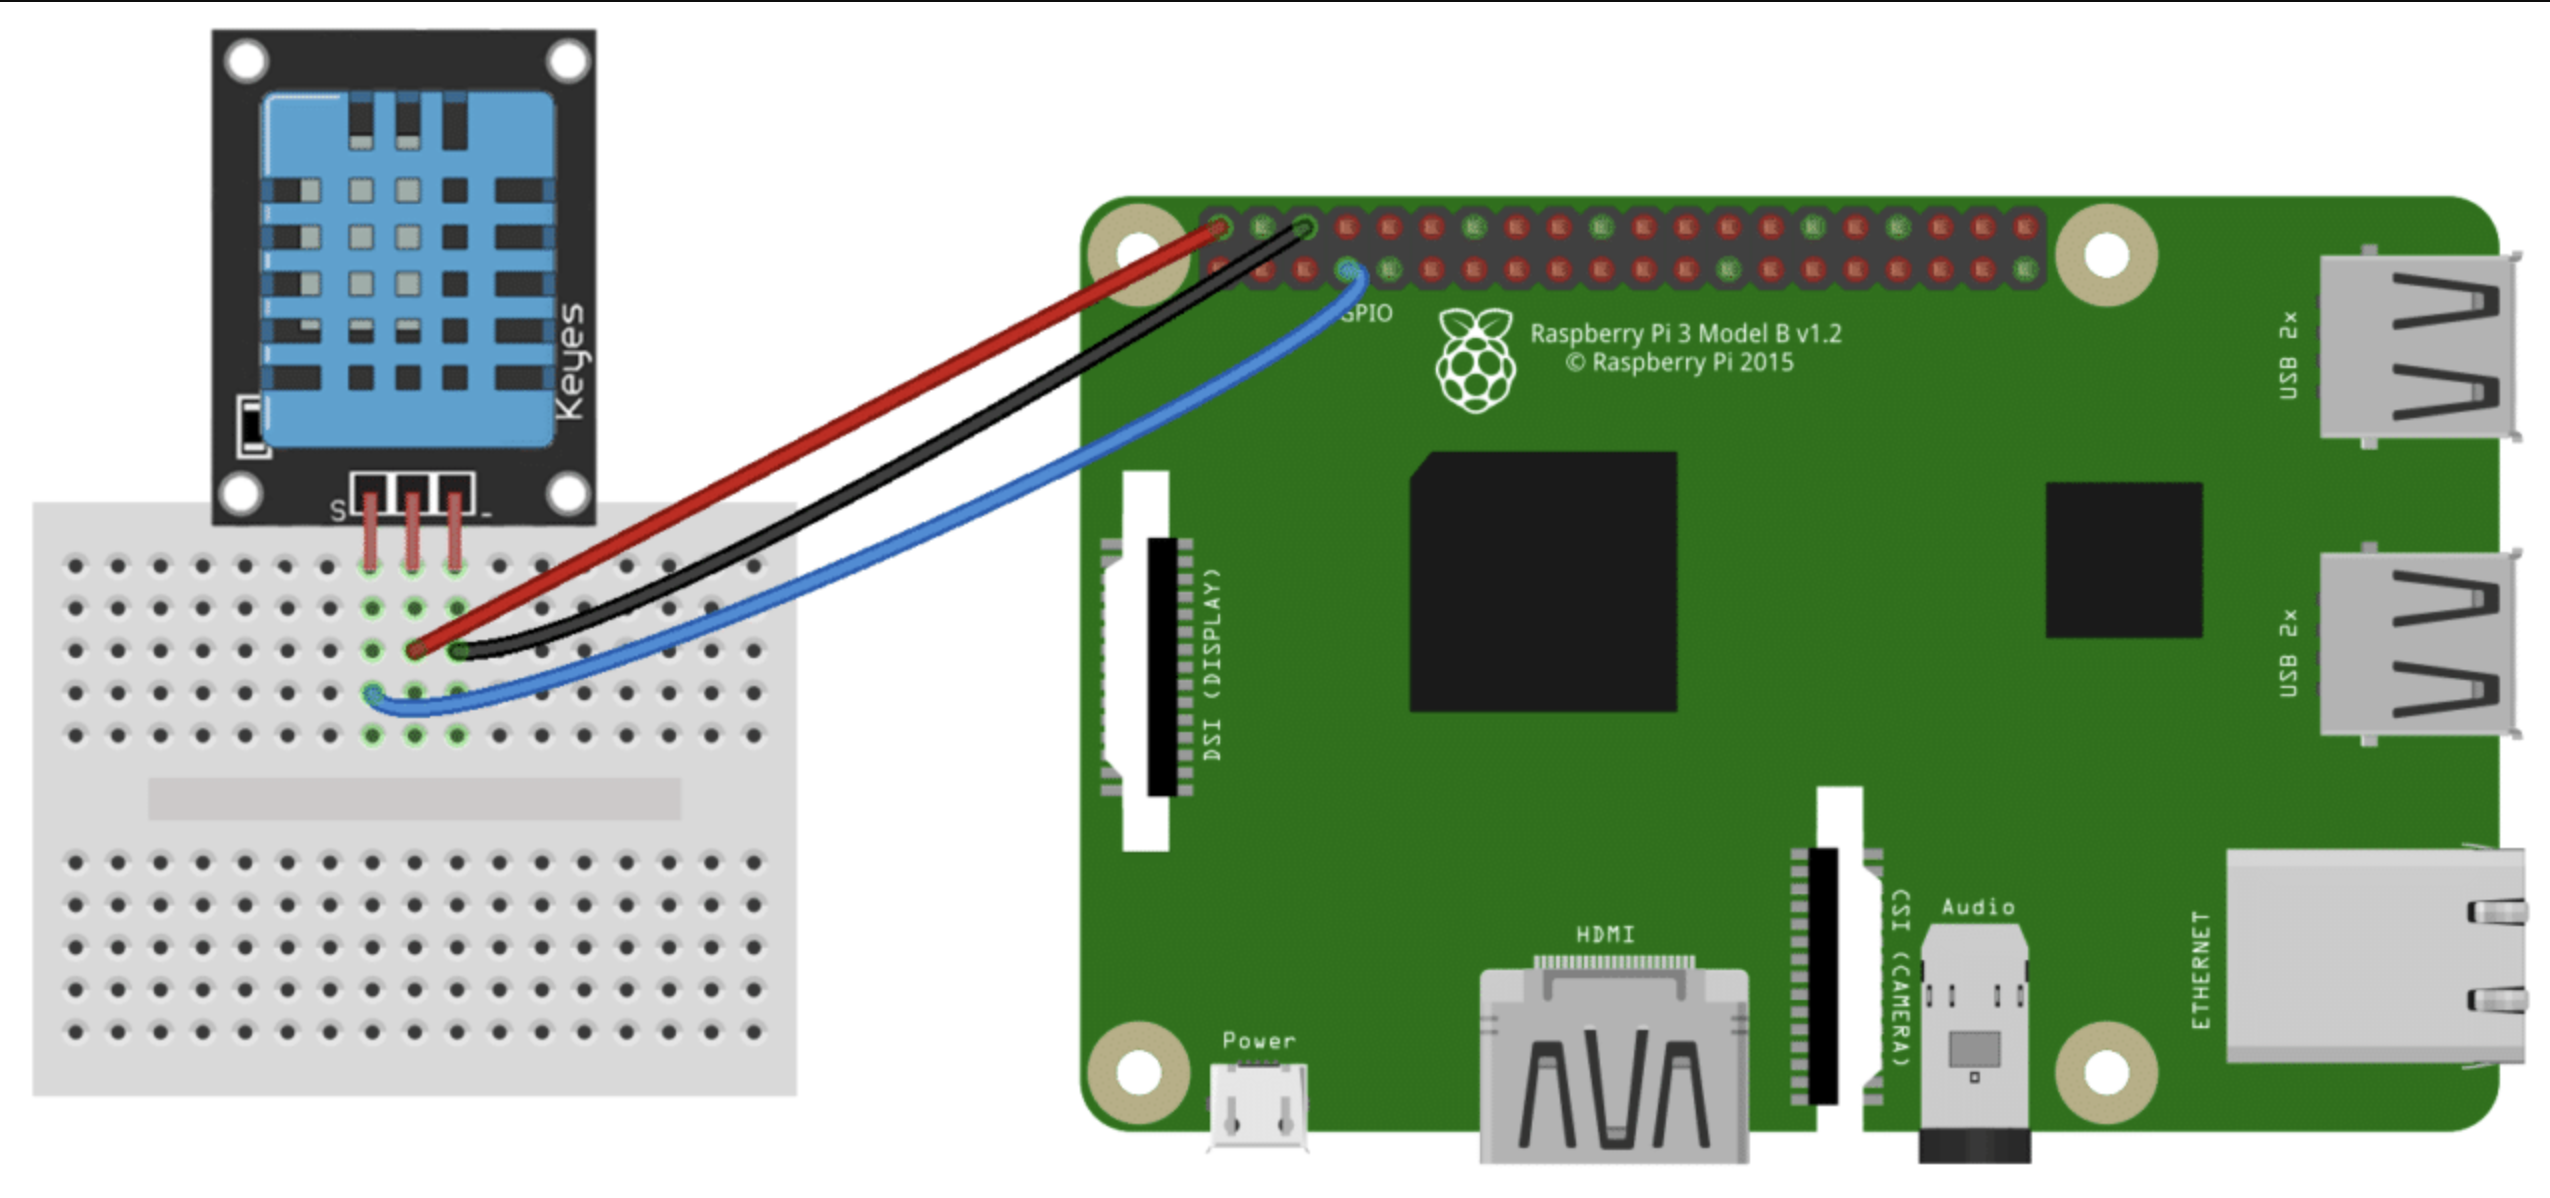
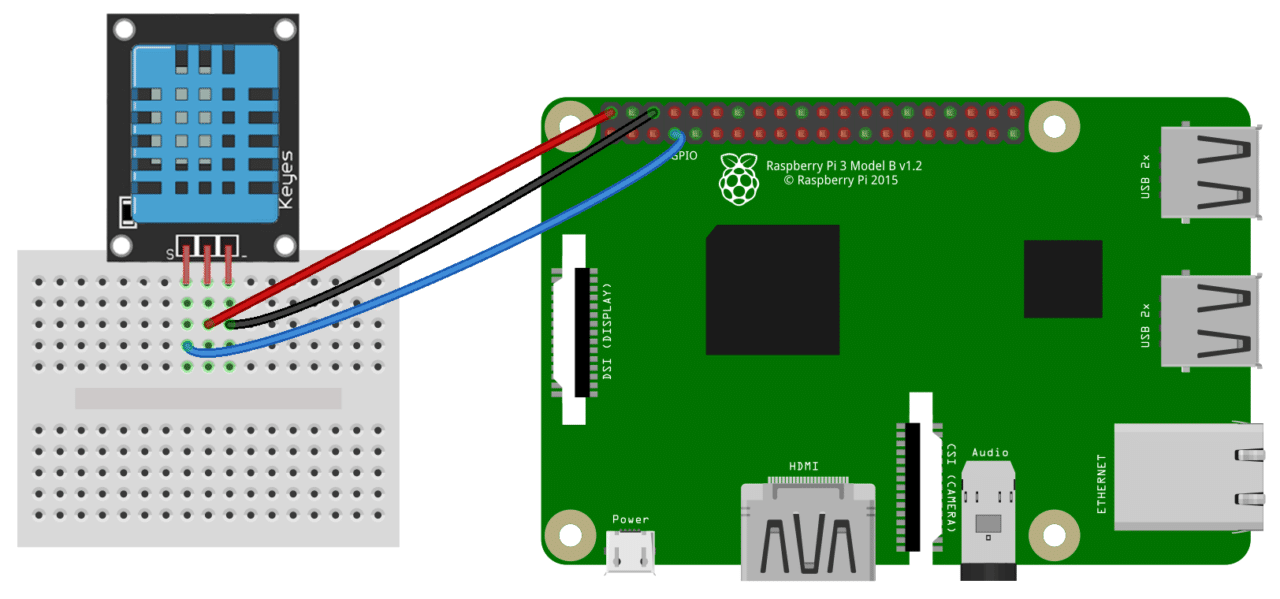
The basic idea is that you have 1 pin for power, 1 pin for signal, and 1 pin to ground the connection. If you do a quick google search on this you’ll find a lot of examples if you’d like to learn more.
Once you’ve got it connected, you can make use of the adafruit_dht library as well as the board library to read directly from the sensor as you see here:
import board
import adafruit_dht

dhtDevice = adafruit_dht.DHT11(board.D12)

temperature = round(dhtDevice.temperature * (9 / 5) + 32)
humidity = dhtDevice.humidity
Note that here I’m using the
boardlibrary to identify the Raspberry pins. Soboard.D12is actually GPIO 18 etc.
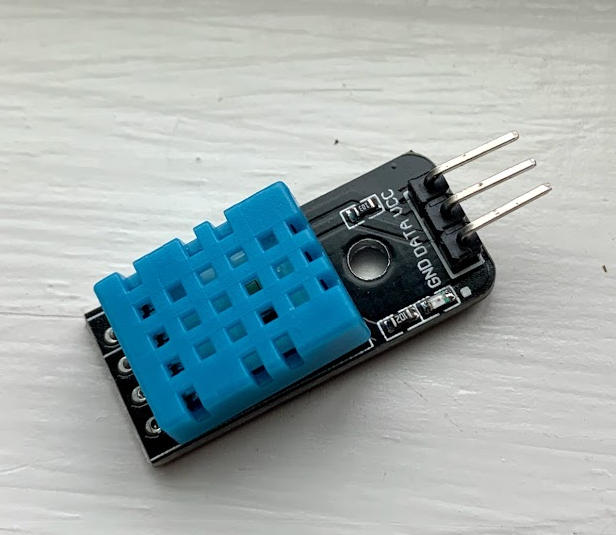
Here is the DHT11 sensor up close. I chose a DHT11 here, but you can also use a DHT22 if you live in more extreme temperature areas.
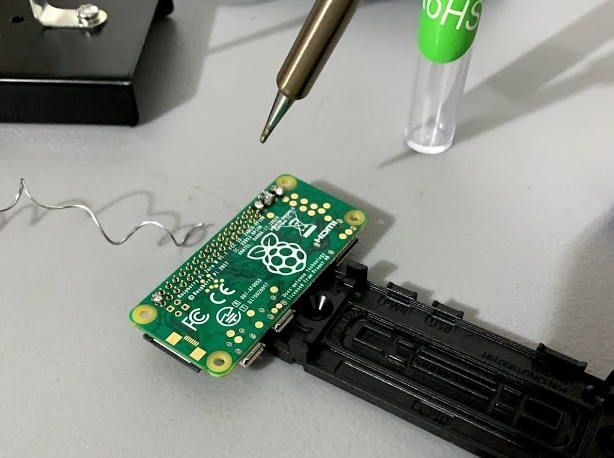
I also should mention that I soldered the GPIO header onto my Raspberry Pi Zero W. This was because the Zero W model specifically has the GPIO header detached. Learning to do this was actually a cool experience and not very difficult. I bought a kit off of Amazon here, and from there it was just a matter sitting down and putting it together. I ran into a couple issues with “solder bridge” but it was very easy to cleanup.
React Frontend
I chose React for the frontend because I’m a fan and it made setting everything up very simple.
I went used RxJS Interval for recurring pulls from Firestore. RxJS Interval is nice because when used with the useEffect hook in React, it automatically updates the screen every 5 minutes (check out the actual implementation in my GitHub project here).
I also built and served my React application with a local Express server. This was good because then I can run it as a background process with the Raspberry Pi. If you look in the project root folder you’ll see the start.sh file that has the basic setup for this. To run this on the Raspberry Pi just navigate to the project and run that.
The project also uses React hooks as well.
Closing Thoughts
Overall, I’m really pleased with my final product. I’ve had it running continuously for a few weeks, and its worked fairly consistently.
Here are some additional things I learned along the way:
- Be careful about what side of the house you place your sensors. I originally put mine through a window on the side of the house that receives the most sun. Not only did this cause the readings to spike during the day, but it also actually broke the first DHT11 sensor I used. I recommend putting your sensor on the most shaded side of your house.
- Check what version of Python and the Adafruit Library that you’re using. When I originally set this up, I used an older version of an Adafruit library specific for the DHT11 sensor. This required a lot of trial and error to get it to work with my DHT11 sensor. Along the way I found out that a new version of the library had been published. When I tried the new version it alleviated a lot of the problems and was much easier to setup.
- NOAA APis are not always reliable. I’ve done quite a few weather projects and have found that NOAA APis work, but you (1) have to test them first and (2) certain times of day they just stop. When I originally set this up, I retrieved NOAAs information more frequently. Over time I found that NOAA APIs can sporadically stop working, and I assume thats a result of various network conditions etc. All the same, since I saw these issues (and to be more performant) I modified my Raspberry Pi’s cronjobs to only pull the forecast information from NOAA twice a day.
- I highly recommend using cronjobs (check out this tutorial for more on cronjobs). I had never used them in a project before, but found them much easier than managing long running programs etc.
This project was a great intro into the world of IoT, and also a fun thing to build at home. My wife and I use it whenever we go outside, and its definitely a fun talking point.
If you want to look at the project, or even build it at home check out my GitHub repo here. The project README has some additional details about local setup etc.
Thanks for reading my post! Feel free to like this post and follow me on Twitter at @AndrewEvans0102!