
Raspberry Pi Time Lapse
Time lapse photography has been around for quite some time. With newer technology and the internet, making time lapse films has become easier and more popular.
The Raspberry Pi also makes it easy to make time lapse films since with a small amount of configuration you can let it do all the work for you.
With the Rapsberry Pi and a USB Webcam, I recently created the following time lapse:
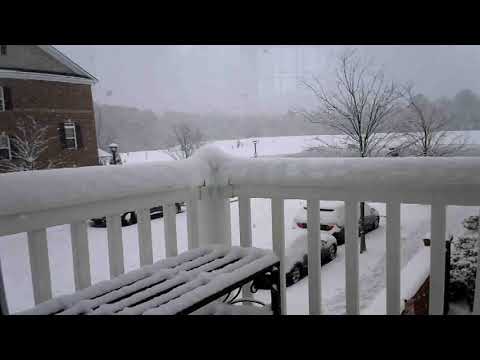
This was a recent snowfall we’d had here in Richmond, Va. I used a Raspberry Pi Zero W and a USB Webcam to take the film over the course of the snowstorm both before and after the snow had fallen. My final project and some supporting materials can be found at my GitHub repo.
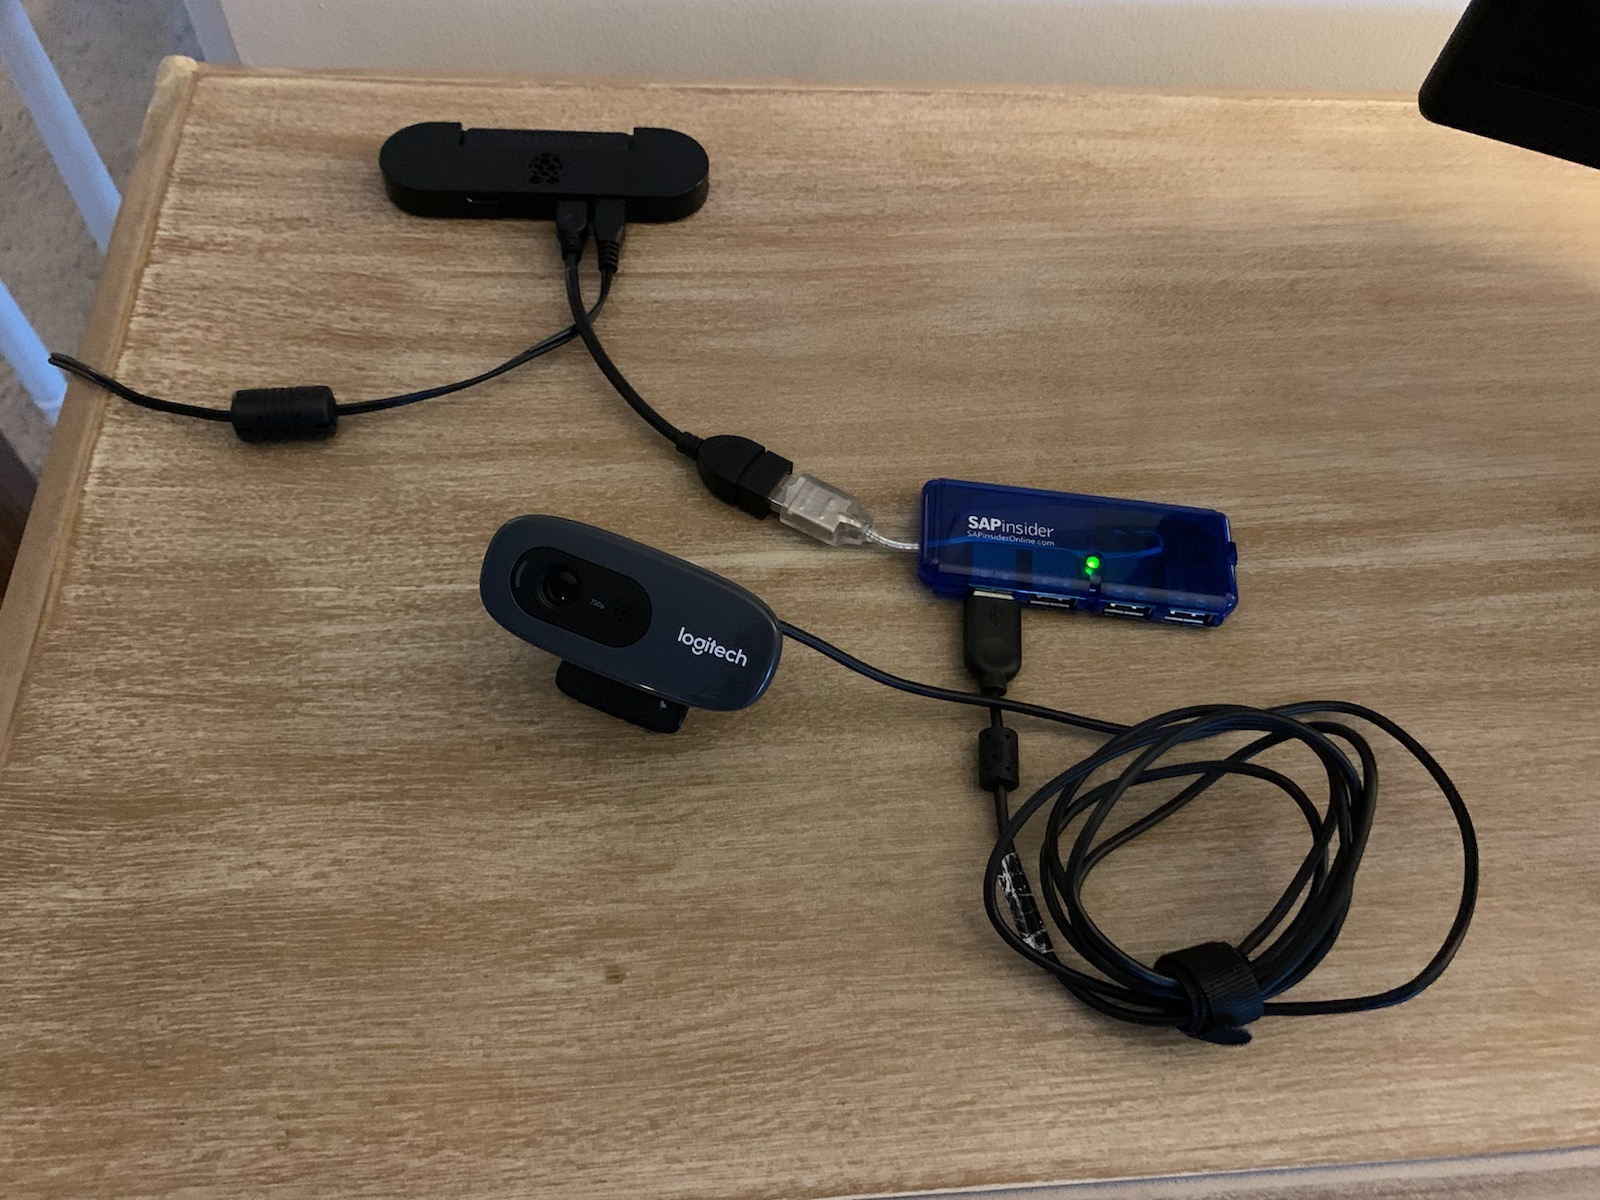
The hardware setup is just a Raspberry Pi Zero W connected to a USB webcam. The nice part about this is that its easy to move around and highly mobile.
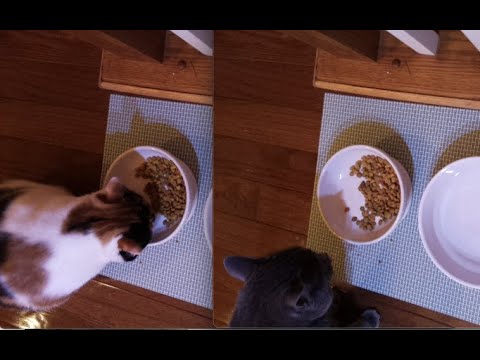
After creating the snow fall time lapse I also got a Raspberry Pi Camera Module. This allowed me to create the following time lapse:
In this post I’m going to share how I created both of these time lapse videos.
I also have created a GitHub project that has all of the instructions on setting this up. I would recommend checking that out as well.
I also created a video on the Rhythm and Binary YouTube channel that walks through the same information in this post:

Some Background
The Raspberry Pi company actually makes an entire camera attachment that you can get and connect to your projects. You can use Python to programmatically capture images and make time lapse films.
If you don’t want to use the Camera Module you can use the Linux program fswebcam to capture pictures with a USB webcam.
I actually did two different projects, one with a USB web cam and another with the Camera Module.
For the USB Webcam setup, the way it basically works is that:
- The Raspberry Pi takes a picture once a minute (via a cronjob run)
- After a set time I use the Linux program mencoder to stitch the individual images into one large video
- To make the video more portable I then use ffmpeg to convert the output AVI from mencoder into MP4.
For the Camera Module, the way it basically works is that:
- I use the PiCamera library to write a simple program that captures pictures at intervals
- I used systemd to create a service on the Raspberry Pi to capture the images whenever I wanted
- I then used
SCPto copy the files from the Raspberry Pi over to my MacBook - I then used
ffmpegto convert the images into an MP4 video.
My motivation was a series of YouTube videos I saw and also Jeff Geerling’s post on how to create a time lapse with a Raspberry Pi. Jeff creates a lot of great videos content and I highly recommend watching his YouTube channel at https://www.youtube.com/c/JeffGeerling.
Required Materials
If you want to do the project with only a USB Webcam, at a minimum you should have the following:
If you want to do the project with the Camera Module, at a minimum you should have the following:
- Raspberry Pi Zero W
- USB Power Supply for Raspberry Pi
- 16 GB SD Card
- Raspberry Pi Camera Module
- Raspberry Pi Zero W Camera Module Cable
Raspberry Pi Headless Setup
To setup my camera and the process of taking the images, I’m using a “headless” Raspberry Pi. This just means that it doesn’t have a desktop environment, and is remotely controlled (via SSH). The process to get setup is as follows:
- install os on SD card using Raspberry Pi Imager (I used Raspberry Pi OS Lite (no desktop))
- Add WPA_SUPPLICANT and SSH files to the “boot” folder on the SD card (check out the Raspberry Pi Docs page on this)
- Find your Raspberry Pis IP address
- SSH into your Raspberry Pi with
ssh pi@<ip_address>
Taking Pictures with the USB Webcam
To get the Raspberry Pi to automatically take pictures SSH into the Pi and do the following:
- Install
fswebcamon the Raspberry Pi
sudo apt install fswebcam- Install
mencoderon the Raspberry Pi
sudo apt install mencoder- Create Shell script to use
fswebcam(see https://www.raspberrypi.org/documentation/usage/webcams/)
#!/bin/bash

DATE=$(date +"%Y-%m-%d_%H%M")

fswebcam -r 1280x720 --no-banner /home/pi/webcam/$DATE.jpg- Setup a cronjob on the Raspberry Pi to run this shell script once a minute with
crontab -eand the actual cronjob looks like this (note I named my shell script “TAKE_PICTURE.sh”):
* * * * * /home/pi/TAKE_PICTURE.sh 2>&1Converting the images into Video
Once your Raspberry Pi has captured several images, you can use mencoder to stitch them together into one single video output.
- Go into the folder that you’ve stored your pictures and create a map with
ls *.jpg > stills.txt - Run
mencoderinside the folder where you’ve saved your files to create a video from the still images
mencoder -nosound -ovc lavc -lavcopts vcodec=mpeg4:aspect=16/9:vbitrate=8000000 -vf scale=1920:1080 -o timelapse.avi -mf type=jpeg:fps=24 mf://@stills.txtI wrote a helper script that automates this process as you see here (you can also see it in my GitHub repo).
#!/bin/bash

rm -rf /home/pi/output

mkdir /home/pi/output

cp -avr /home/pi/webcam /home/pi/output/images

cd /home/pi/output/images

ls *.jpg > stills.txt

# fast
mencoder -nosound -ovc lavc -lavcopts vcodec=mpeg4:aspect=16/9:vbitrate=8000000 -vf scale=1920:1080 -o /home/pi/output/VIDEO_FAST.avi -mf type=jpeg:fps=24 mf://@stills.txt

# slow
mencoder -nosound -ovc lavc -lavcopts vcodec=mpeg4:aspect=16/9:vbitrate=8000000 -vf scale=1920:1080 -o /home/pi/output/VIDEO_SLOW.avi -mf type=jpeg:fps=4 mf://@stills.txt
This will create an AVI file that is the combined time lapse video. You can stop here or you can convert and send it somewhere (as you’ll see in the next section).
Converting the USB Webcam Images to Video
To make the videos more portable I decided to convert the AVI files that were generated into MP4 files.
To do this I did the following:
- Copy the video file over to your primary computer (in my case it was a MacBook)
scp -r pi@<pi_address>:/home/pi/webcam /Users/<your_username>/webcam- Install
ffmpegto convert AVI file over to MP4 (I used a MacBook so I installed it with homebrew)
brew install ffmpeg- Convert AVI file over to MP4 with ffmpeg
ffmpeg -i timelapse.avi timelapse.mp4Once you’ve done that, you now have an MP4 file that you can put on YouTube or just share with friends and family.
I wrote a helper script for this as well that automates pulling the video file from my Raspberry Pi to my MacBook (you can see in my GitHub repo).
#!/bin/bash

# Modify the variables here based on your username and where you want to store the files
USERNAME="pi"
ADDRESS="camera.local"
OUTPUT_SOURCE="/home/pi/output/"
FOLDERNAME="Snow/"
MACBOOK_USERNAME=$USER
OUTPUT_DESTINATION="/Users/"$MACBOOK_USERNAME"/Pictures/"$FOLDERNAME
DATE=$(date +"%Y-%m-%d_%H%M")

# create folder in pictures for this video
mkdir $OUTPUT_DESTINATION$DATE

# copy the fast video first
scp $USERNAME@$ADDRESS:$OUTPUT_SOURCE"/VIDEO_FAST.avi" $OUTPUT_DESTINATION$DATE"/VIDEO_FAST.avi"

# copy the slow video second
scp $USERNAME@$ADDRESS:$OUTPUT_SOURCE"/VIDEO_SLOW.avi" $OUTPUT_DESTINATION$DATE"/VIDEO_SLOW.avi"

cd $OUTPUT_DESTINATION$DATE

# create the fast video in MP4 format
ffmpeg -i VIDEO_FAST.avi VIDEO_FAST.mp4

# create the slow video in MP4 format
ffmpeg -i VIDEO_SLOW.avi VIDEO_SLOW.mp4
Taking Pictures with the Camera Module
If you want to use the Camera Module instead of a USB Webcam, I did the following:
-
Connect the Raspberry Pi Camera Module to the Raspberry Pi
-
Setup the PiCamera library to run on your Raspberry Pi with installation instructions
-
Write your first python script that runs the camera (use this to make sure it is working), see first_picture.py
-
Write your second python script that uses the “capture continuous” method to continually take pictures. see time_lapse.py
-
Create a service that will run your python script in the
/home/pifolder on your Raspberry Pi, see timeLapse.service -
Copy your service over to the Raspberry Pi’s
etcfolder with
sudo cp timeLapse.service /etc/systemd/system/timeLapse.service- Start your service with
sudo systemctl start timeLapse.service-
Verify that pictures are being written out to the
/home/pi/webcamfolder -
Wait for however long you want to do the time lapse
-
When you’re ready to stop taking the pictures, stop the service with
sudo systemctl stop timeLapse.service-
Use the helper script COPY_FILES_BUILD_LOCAL.sh to copy the images over to your MacBook and then use
ffmpegto convert the images into a video -
Check out the generated MP4 files and enjoy!
Closing Thoughts
This project was a fun entry into the world of time lapse photography. After I started playing with this I realized how useful (and fun) it was. You can do time lapse on all kinds of processes and things that we do everyday. I’m planning to do time lapses for 3D printing, Woodworking, gardening, and more in the future.
You could also take this process and incorporate some cloud services to make it even more automated. I had considered sending the files over to AWS and then using lambdas to convert the files and create signed URLs that I could share with friends and family. The cool part is that everything I’ve covered here is configurable and can be tweaked to fit whatever project you want.
If you check out my GitHub repo, I have a list of helpful links.