
React Testing
If you’re building React apps today, you’ll probably have heard a lot of different opinions on testing. Some people swear by it, and even follow Test Driven Development (TDD). Other folks are less opinionated, but still prefer tests in categories like “unit” or “integration.” On top of all of these opinions, there are a lot of different patterns and tools that you could potentially use for your projects.
The important thing about Testing is that it can greatly improve your project, and also your ability to make changes. Testing documents features and behavior, but also ensures that new things you do won’t break the old system. When you have tests, that shows that your app behaves a certain way. You can use these same tests to verify that a new thing you did, has not broken what was there before. Testing also allows you to have a healthy view of your application, and be able to more easily see things like unused code or redundant areas.
In this post I’m going to walkthrough some patterns and also showcase tests with Jest, The React Testing Library, and Cypress.
I’m going to be referring to some tests for a sample project I’ve written called “Chessie Chow Chow.” The app is basically a meal planning app that helps you plan breakfast, lunch, and dinner for each day.
I actually have a full (production) version of this project available at chessiechowchow.com. The version of the project that we’ll be walking through is much more simplified and can be reached at https://www.github.com/andrewevans0102/react-testing.
Please note that in this post I’ll be focusing on “functional component” testing. If you have an older React app, then you’ll be doing class based component testing. There are different ways to test both of these types of React Apps. However, the general process and syntax are very similar so I just focused on “functional components” for this post.
Testing Types
As I mentioned in the intro, there are multiple opinions and patterns on testing. Different projects have different needs. I don’t think there is necessarily a “one size fits all” approach, but I’ll share what has worked for me.
First, I’ve seen tests that mostly fall into one of the following patterns:
unit tests, these are what tests the code itself without dataintegration tests, these test code as it interacts with an external service or even a different part of the same projectregression tests, these are tests that verify that some change you are making does not break the existing systemend to end (e2e) tests, these are full tests of a project (both front and back end)
Some people get more into semantics, and break these down into more granular types. You’ll hear about the “testing pyramid” as well as “functional tests.” I’m not going to go into those, but just wanted to introduce the above set of types in case you wanted to do some googling and learn more.
Testing Tools
If you’re using any type of React project, you’ll have seen Jest somewhere. Whether it be in the docs or even in the result of a create-react-app project.
Jest is a JavaScript testing framework that will work with any JavaScript application. It is built and owned by Facebook and is also open source with the MIT License. You can install Jest with yarn or npm. You can also see Jest’s source code on the official GitHub Repo.
Jest has a lot of great documentation, and is fairly straightforward to install with any of the major frameworks and libraries.
The testing page for React recommends using Jest and has a great intro to how to install it with your project (or use it in a create-react-app project).
The testing page for React also recommends The React Testing Library. This is largely an enhancement of Jest, and has helper functions that make mocking and testing components easier. The React Testing Library also is open source, and has fairly good documentation. There is a good community support for The React Testing Library as well, which means its easy to go grab some help on stackoverflow.
Finally, Cypress is a very robust end to end (e2e) library that works right alongside your projects. There is a great amount of community support for Cypress, and they have really good documentation as well. Cypress is a great alternative to frameworks that use selenium webdriver as it runs in the same runtime as your application. This means that things like mocking and synchronizing are much easier. Cypress also does some cool things with generating artifacts (videos and screenshots) of your tests. These artifacts could be really useful when sharing deployment results from a pipeline, or just the latest run of your tests.
Testing Patterns
No matter the type of test, I have always seen tests in software follow the following pattern:
- Arrange
- Act
- Assert
Arrange refers to setting up the test. This might mean creating mock data, or instantiating an object to get it ready to be “exercised” by your test.
Act means doing the actual activity that constitutes the test. This is basically calling the function or service to do the thing.
Assert means to verify the results were what you expected. This could be a resulting piece of data or even an error if you’re testing what happens when your software has issues.
Back to the sample project
If you pull up my sample project, you’ll see that we have a very simple application that has 2 pages with some shared components, and also uses React Redux. You’ll also note that the app uses material-ui for styling.
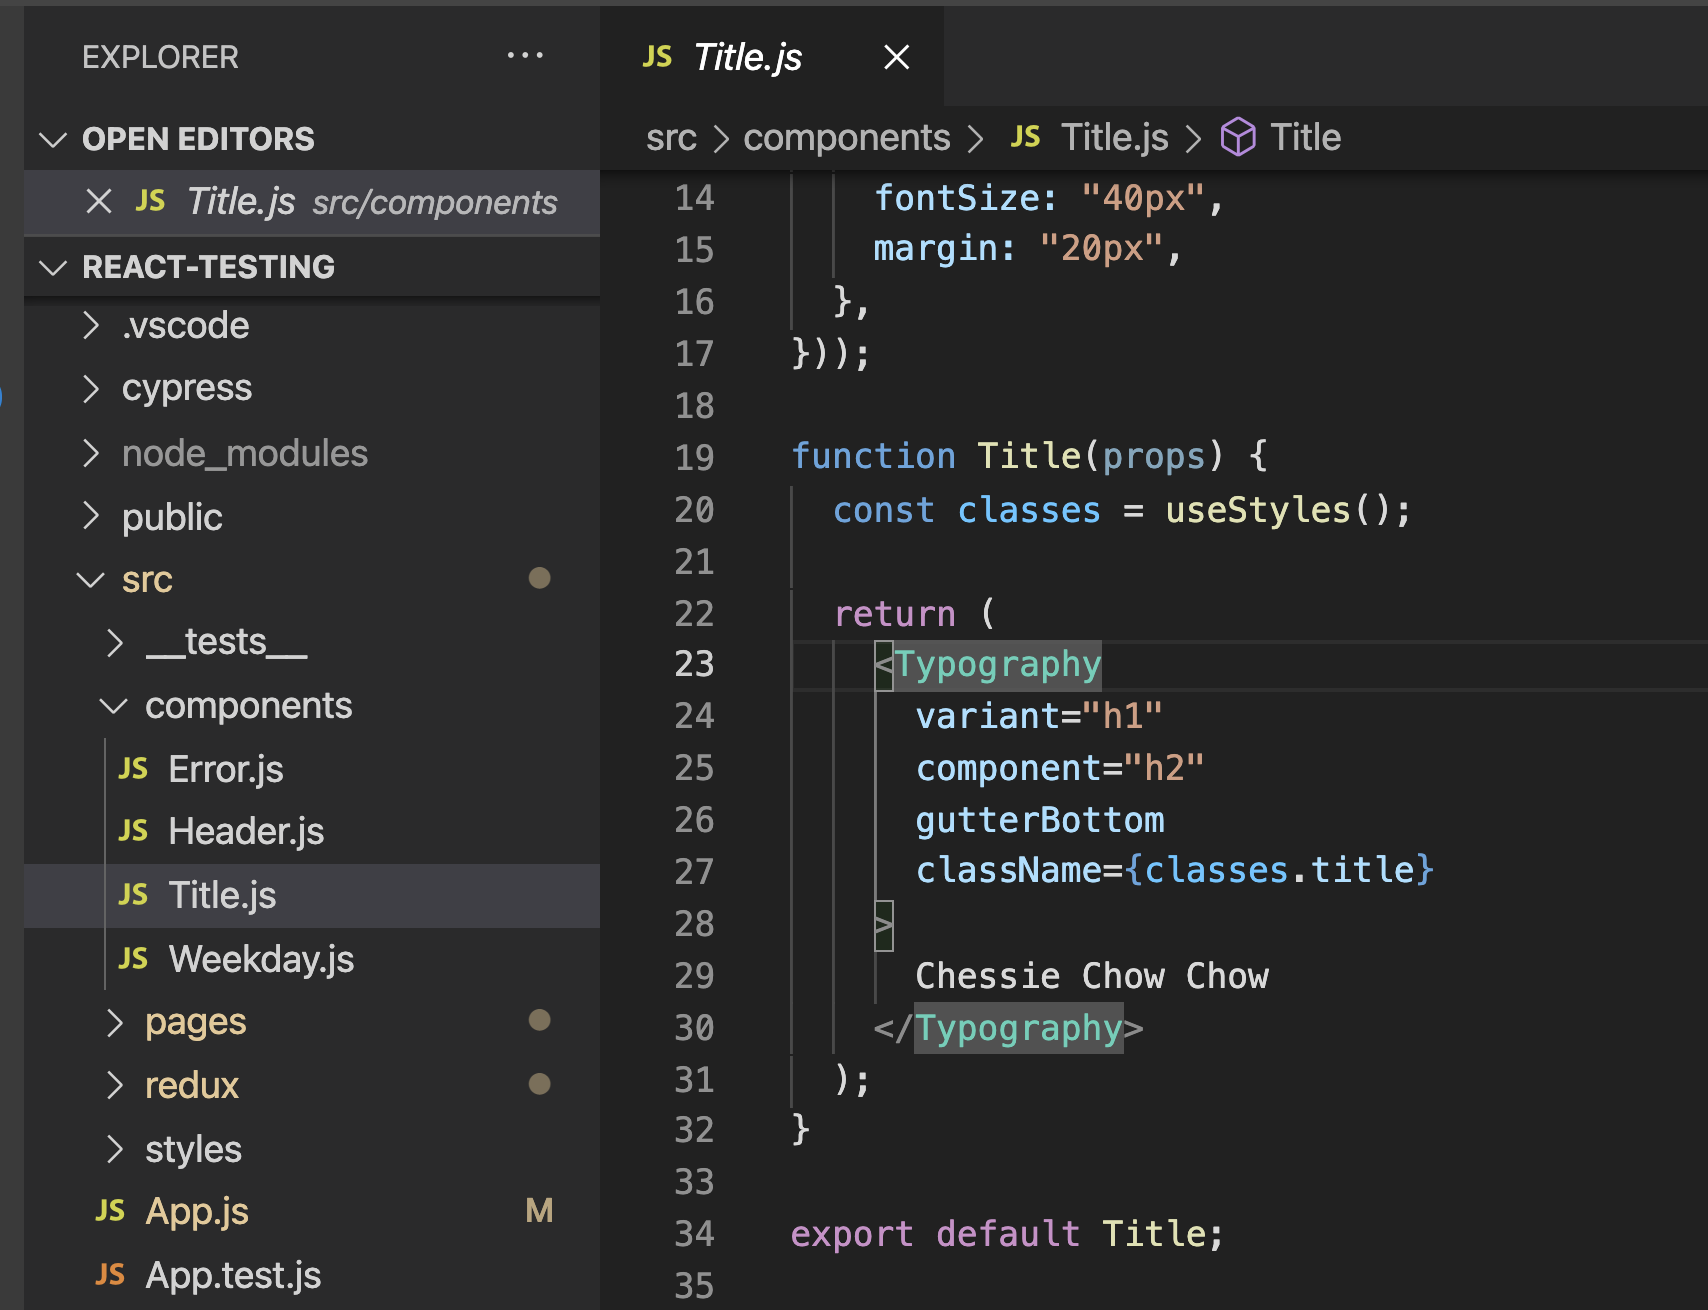
The shared components are in the src/components folder. The most simple of these is the Title component:
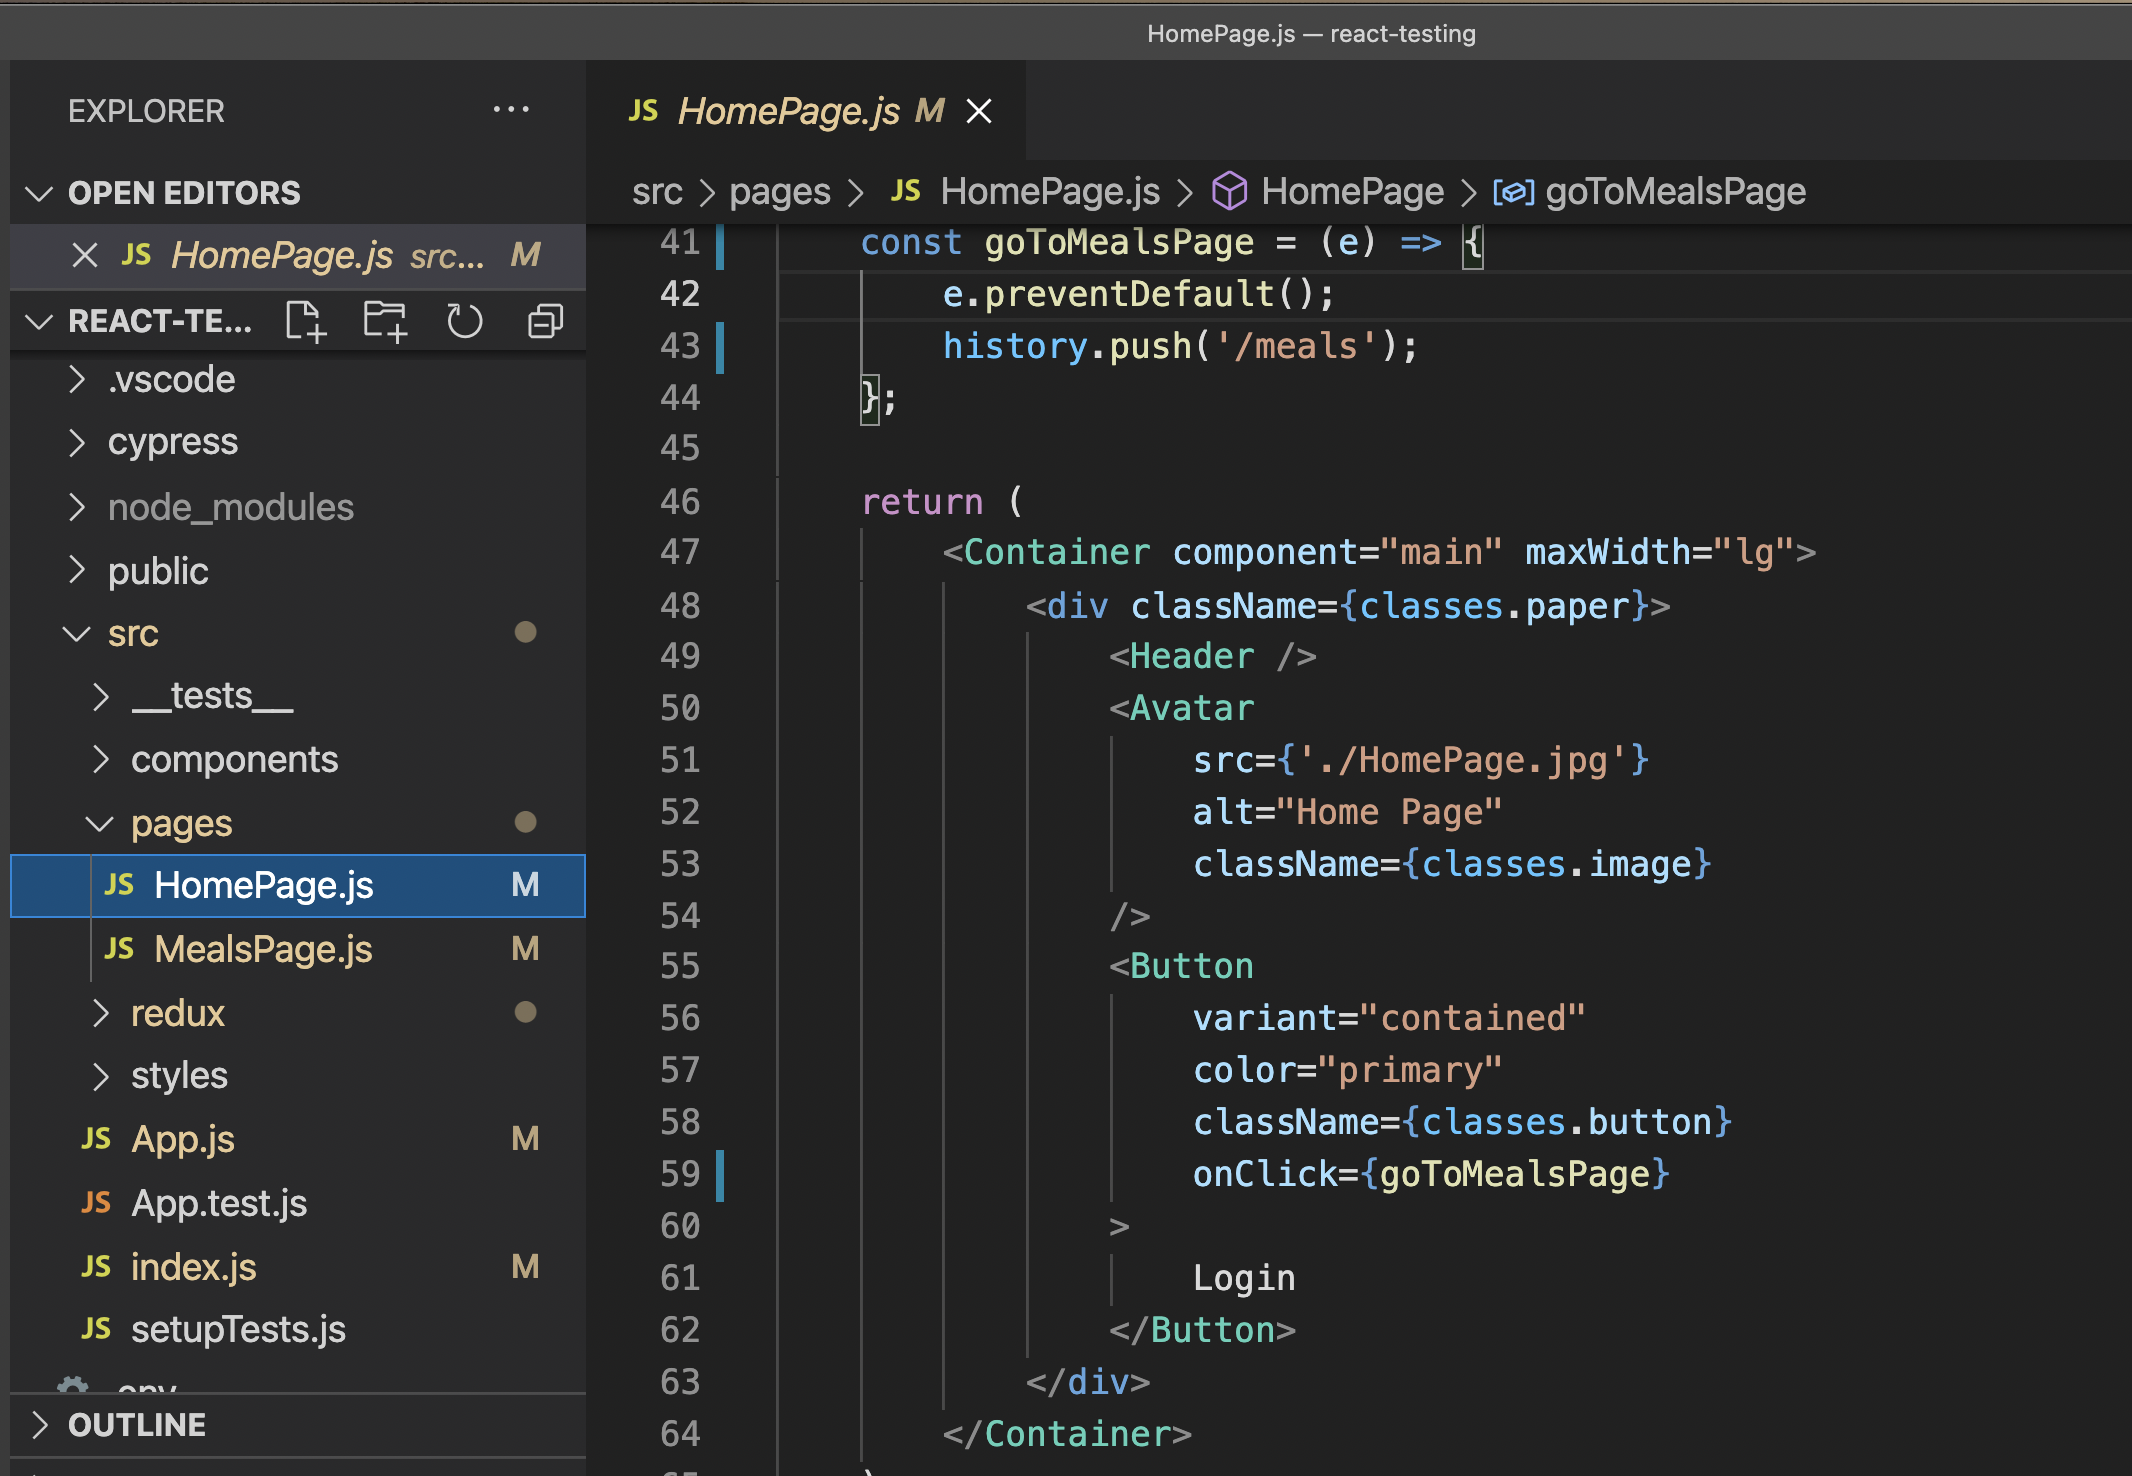
The two pages are found in the src/pages folder and consist of a Home Page and a Meals Page which is where your meals are entered.
In the following sections, I’ll show you how to write tests for these pages and components.
Jest Tests
Following the guildelines in the React Testing Recipe Page, writing tests with Jest follows a fairly simple pattern.
First, when you run Jest against a project, it will search for .test or .spec files. So this means you can technically position them anywhere you’d like in your project. By default, Jest also looks for tests in the __tests__ folder in a project (see defaults). I recommend just creating a __tests__ folder under src and putting your tests there.
In my sample project I’ve setup an npm script that calls Jest with the react scripts that come with a create-react-app project. If you’re following along with my sample project, just run npm run unit-test to see them in action.
When writing the tests, you leverage the beforeEach and afterEach blocks that Jest has for building tests to create a Document Object Model (DOM) that you can run your tests against. These blocks will run before and after all the tests in a section.
// https://reactjs.org/docs/testing-recipes.html#setup--teardown

let container = null;
beforeEach(() => {
  // setup a DOM element as a render target
  container = document.createElement("div");
  document.body.appendChild(container);
});

afterEach(() => {
  // cleanup on exiting
  unmountComponentAtNode(container);
  container.remove();
  container = null;
});
Then in your test you call render and then assert if an element is present:
it("renders title and shows correctly", () => {
  act(() => {
    render(<Title />, container);
  });
  expect(container.textContent).toBe("Chessie Chow Chow");
});
Also note the use of the act function here. That wraps behavior so that you can control flow and have a “unit” of interaction. For more on act and other built in Jest functions, check out the React Page.
If you have something more complicated (in the case of React Redux), then you can do the same thing but with a provider as you see in the header test here:
import Header from "../../components/Header";

const initialState = {};

const { store } = configureStore(initialState);

// https://reactjs.org/docs/testing-recipes.html#setup--teardown

let container = null;
beforeEach(() => {
  // setup a DOM element as a render target
  container = document.createElement("div");
  document.body.appendChild(container);
});

afterEach(() => {
  // cleanup on exiting
  unmountComponentAtNode(container);
  container.remove();
  container = null;
});

it("renders header and shows correctly", () => {
  act(() => {
    render(
      <Provider store={store}>
        <Header />
      </Provider>,
      container,
    );
  });
  expect(container.textContent).toBe("Chessie Chow Chow");
});
The React Testing Page has a whole section on Redux that I highly recommend checking out at https://reactjs.org/docs/testing-recipes.html#setup—teardown.
The React Testing Library
As your tests become more complicated, using the built in functions like act can get somewhat tedious. The React Testing Library helps that along with several functions that consolidate both firing off events and listening for results.
When using The React Testing Library you can run it with your regular Jest tests. If you’re following along in my sample project just run npm run unit-test to see this in action.
If you notice the Weekday component test, it first checks to make sure the page can render. So far this just uses the pattern we’ve already seen with Jest:
const initialState = {};
const { store } = configureStore(initialState);
const weekdayMeals = {
breakfast: "",
lunch: "",
dinner: "",
};
// https://reactjs.org/docs/testing-recipes.html#setup--teardown
let container = null;
beforeEach(() => {
// setup a DOM element as a render target
container = document.createElement("div");
document.body.appendChild(container);
});
afterEach(() => {
// cleanup on exiting
unmountComponentAtNode(container);
container.remove();
container = null;
});
it("renders weekday and shows correctly", () => {
render(
<Provider store={store}>
<Weekday meal={weekdayMeals} />
</Provider>,
container,
);
expect(container.textContent).toBe("BreakfastLunchDinnerEditSave");
});However, when you want to test interaction with the app (more than just testing for rendering), it helps to have the screen object to query. You specifically see that with the following test:
it("saves weekday meal correctly", () => {
const saveMeal = jest.fn();
render(
<Provider store={store}>
<Weekday meal={weekdayMeals} saveMeal={saveMeal} />
</Provider>,
container,
);
expect(container.textContent).toBe("BreakfastLunchDinnerEditSave");
// edit button
const editButton = screen.getByTestId("mealEdit");
// save button
const saveButton = screen.getByTestId("mealSave");
// edit button should be enabled first
expect(editButton).toBeEnabled();
// save button should not be enabled until edit is clicked
expect(saveButton).toHaveAttribute("disabled");
expect(saveButton).toBeDisabled();
// click the edit button to unlock the fields for input
fireEvent.click(editButton);
// edit button is clicked so now it should be disabled
expect(editButton).toHaveAttribute("disabled");
expect(editButton).toBeDisabled();
// now that edit button is clicked save should be enabled
expect(saveButton).toBeEnabled();
// click the save button to lock the field for input
fireEvent.click(saveButton);
// edit button should now be disabled
expect(editButton).toBeEnabled();
// save button should not be enabled after it is clicked
expect(saveButton).toHaveAttribute("disabled");
expect(saveButton).toBeDisabled();
// expect save meal to have been called
expect(saveMeal).toHaveBeenCalledTimes(1);
});This test basically tests for a flow where you:
- click “edit” to unlock a field for input
- input your information
- click “save” to lock the field back
- see that the “save” field is then locked again after you’re done
In all cases, the screen object makes this very easy to read and build. If you did the same thing with the built in Jest functions you’d have to query the DOM elements individually and pass events like you see here (copied from the React Page):
// get ahold of the button element, and trigger some clicks on it
const button = document.querySelector("[data-testid=toggle]");
expect(button.innerHTML).toBe("Turn on");

act(() => {
  button.dispatchEvent(new MouseEvent("click", { bubbles: true }));
});
The React Testing Library helps a great deal in making tests easier to build and read as well.
Cypress
Both Jest and The React Testing Library provide ways to basically “unit” test or locally test components. You are using a local DOM that isn’t the actual application running.
Cypress allows you to actually run your app, and walkthrough all of the flows. I have written a few posts on Cypress in the past. My most recent one How to use Cypress for E2E with React includes a YouTube video and in depth review of many of the features. I’m just going to show a few quick tests here, and recommend you check out that post (as well as the Cypress Docs) for more.
To get Cypress up and running, you first install it in your project with the following:
npm install cypress --save-devOnce it finishes, your project now has a cypress folder that includes a few folders. (copied from my original post) here are what they are:
fixturesis where you build mocks or stubbed responses for your testsintegrationis where you place your actual test .spec.js files by default.pluginsallow you to extend Cypress behavior screenshots and videos are where the test runner will store visual copies of test runs (more on that in the next sections)supportallows you to define “commands” or boil plate behavior you can reference in your tests avoiding the need to repeat startup tasks like login or similar flows
In the integration folder it also includes a full set of prebuilt examples. This is one of the best parts about Cypress, it makes writing tests easier. The examples help you see some code you can copy and paste to work with your app. The docs build on those examples and help you to get going quickly.
There are also different ways that you can run Cypress. You can run with a “hot reloader” and run it locally alongside your app. When you’re ready to move to your pipeline, you can run a headless version of Cypress against your project.
Please note that one known limitation of Cypress is that it only covers Chrome, Firefox, and a few other browsers. If your project uses a specific browser, Cypress might be better as an add on to an existing QA process.
I usually add the following npm scripts to my projects that use Cypress:
"cypress-open": "./node_modules/.bin/cypress open",
"cypress-local": "concurrently \"npm run start\" \"npm run cypress-open\"",
"cypress-run": "./node_modules/.bin/cypress run",
"cypress-ci": "start-server-and-test \"npm run start\" http://localhost:3000 \"npm run cypress-run\""
If you notice, they also use concurrently and start-server-and-test. These allow you to run Cypress alongside your project. I use concurrently for local runs, and start-server-and-test for CI runs.
If you want to run Cypress with my sample project, run npm run cypress-local to see it with the test runner. If you run npm run cypress-ci you’ll see it running with the headless settings.
If you run Cypress locally, you’ll see the test runner pop up almost immediately.
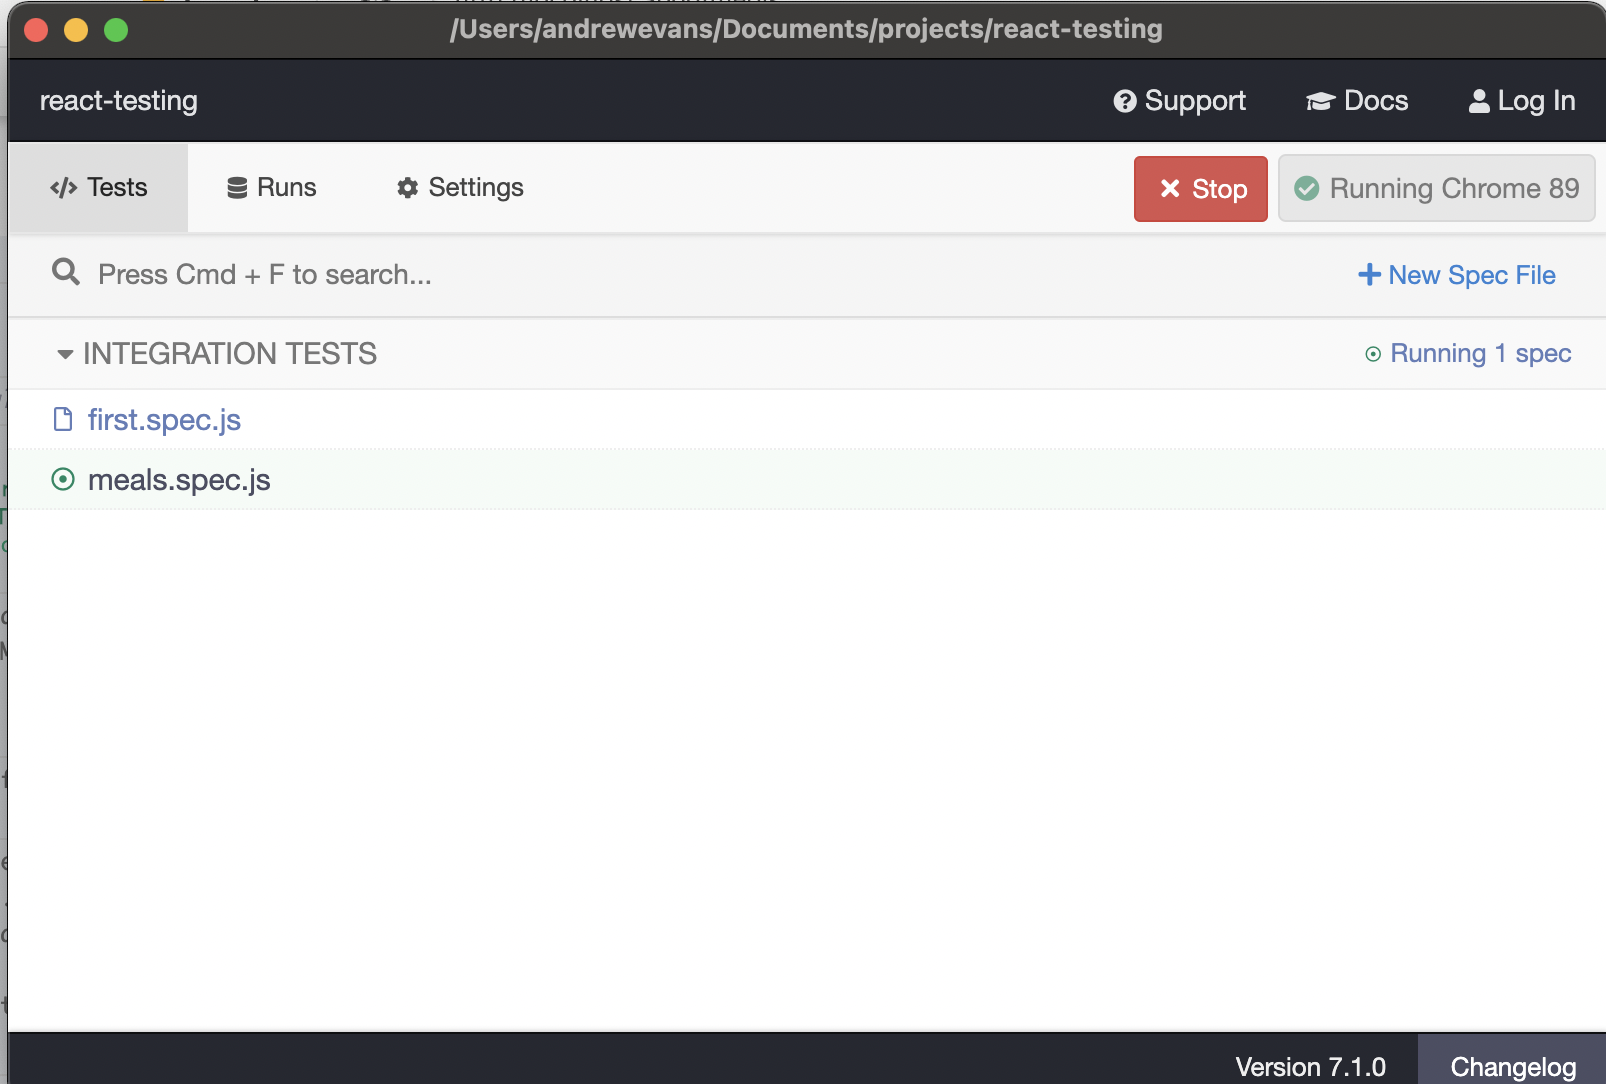
This allows you to run individual tests (or all of them at the same time).
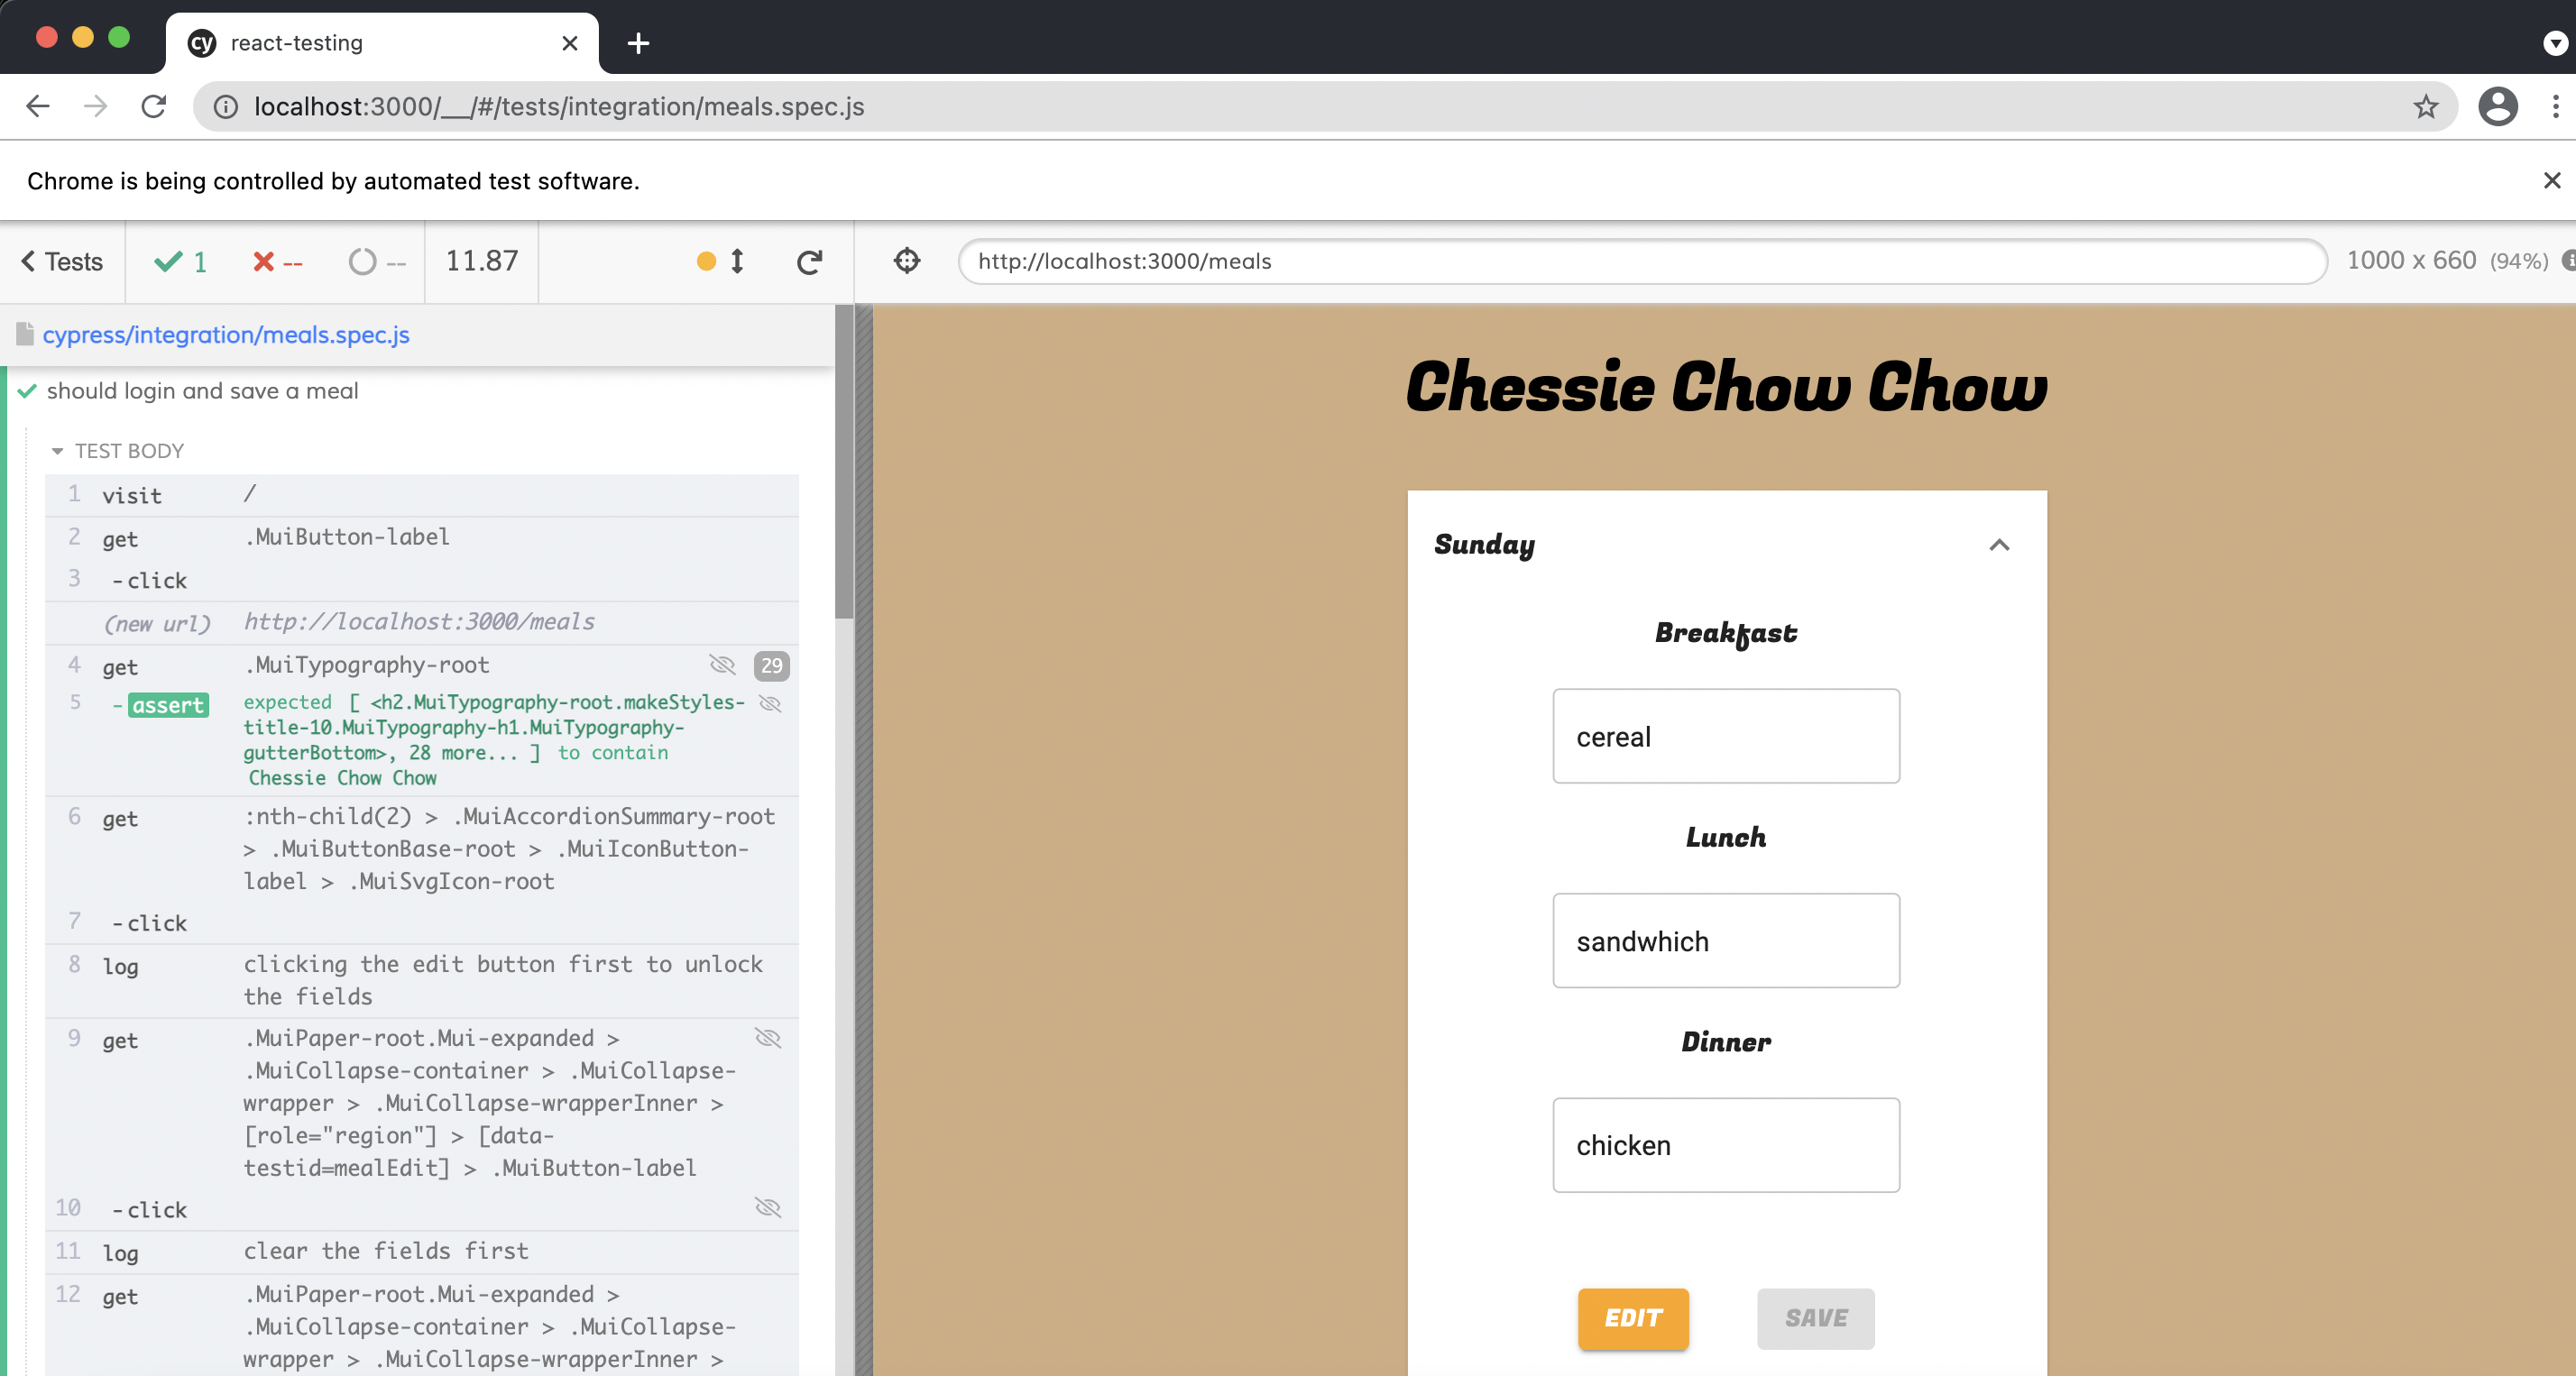
When tests run, you’ll see a version of Chrome run your tests locally. You can then navigate back and fourth between the different steps.
Writing the tests is pretty straightforward as well. You use the builtin cy object, and then control its interaction with your app.
The most simple test is:
it("should visit home page", () => {
  cy.visit("/");
});
In this test, you’re just telling it to go to the default route.
A more complicated test, includes interactions where you pass data to fields and events to the different parts of the page:
it("should login and save a meal", () => {
  cy.visit("/");
  cy.get(".MuiButton-label").click();
  cy.get(".MuiTypography-root").should("contain", "Chessie Chow Chow");

  const sundaySelector =
    '.MuiPaper-root.Mui-expanded > .MuiCollapse-container > .MuiCollapse-wrapper > .MuiCollapse-wrapperInner > [role="region"] > [data-testid=mealEdit] > .MuiButton-label';
  const sundayBreakfast =
    '.MuiPaper-root.Mui-expanded > .MuiCollapse-container > .MuiCollapse-wrapper > .MuiCollapse-wrapperInner > [role="region"] > .MuiAccordionDetails-root > :nth-child(2) > .MuiInputBase-root > [rows="1"]';
  const sundayLunch =
    '.MuiPaper-root.Mui-expanded > .MuiCollapse-container > .MuiCollapse-wrapper > .MuiCollapse-wrapperInner > [role="region"] > .MuiAccordionDetails-root > :nth-child(4) > .MuiInputBase-root > [rows="1"]';
  const sundayDinner =
    '.MuiPaper-root.Mui-expanded > .MuiCollapse-container > .MuiCollapse-wrapper > .MuiCollapse-wrapperInner > [role="region"] > .MuiAccordionDetails-root > :nth-child(6) > .MuiInputBase-root > [rows="1"]';

  cy.get(
    ":nth-child(2) > .MuiAccordionSummary-root > .MuiButtonBase-root > .MuiIconButton-label > .MuiSvgIcon-root",
  ).click();
  cy.log("clicking the edit button first to unlock the fields");
  cy.get(sundaySelector).click();
  cy.log("clear the fields first");
  cy.get(sundayBreakfast).clear();
  cy.get(sundayLunch).clear();
  cy.get(sundayDinner).clear();
  cy.log("enter the meals second");
  cy.get(sundayBreakfast).type("cereal");
  cy.get(sundayLunch).type("sandwhich");
  cy.get(sundayDinner).type("chicken");
  cy.log("clicking the save after entering meals");
  cy.get(
    '.MuiPaper-root.Mui-expanded > .MuiCollapse-container > .MuiCollapse-wrapper > .MuiCollapse-wrapperInner > [role="region"] > [data-testid=mealSave] > .MuiButton-label',
  ).click();

  cy.get(
    ":nth-child(2) > .MuiAccordionSummary-root > .MuiButtonBase-root > .MuiIconButton-label > .MuiSvgIcon-root",
  ).click();
  cy.get(sundayBreakfast).should("contain", "cereal");
  cy.get(sundayLunch).should("contain", "sandwhich");
  cy.get(sundayDinner).should("contain", "chicken");
});
Cypress also recommends automating the login feature of an app to avoid repeating your steps. They have a whole set of guides on this with services like Amazon Cognito at https://docs.cypress.io/guides/testing-strategies/amazon-cognito-authentication#Setting-Amazon-Cognito-app-credentials-in-Cypress.
One of the best parts about Cypress is that its really useful, and fun to work with. Testing often times can be difficult, but Cypress makes it an easier experience for teams.
Closing Thoughts
In this post I shared some basics about testing, and also some tools that you can use in React apps. I walked through the concept of testing, and introduced Jest, The React Testing Library, and Cypress. As I stated in the intro, testing is a really powerful way to improve your applications and the speed at which you deliver changes. I recommend checking out my sample project, and also looking at the various docs I’ve shared here.