
Building an API with the Serverless Framework
When building APIs you have several options today. The serverless framework provides a great toolset that automates the process.
In this post I’m going to walkthrough building a meal planning API in python with the severless framework. The API will be hosted in AWS and use Dynamo DB for storage. I will be using a sample project that can be found at my github repo. You can do a git clone of this project to follow along.
What is the Serverless Framework?
The serverless framework can be found at serverless.com. It is an automated way of building and deploying severrless infrastructure with the major cloud providers to include AWS. It uses a CLI to build and package your projects. If you’ve setup the AWS CLI on your machine, the serverless CLI will use those credentials to talk to AWS. When you do a deploy, the serverless CLI will create a “stack” with cloud formation templates that build your project with infrastructure as code. Then as you do updates, the stack will be updated as well.
In the case of Lambdas, the serverless framework will leverage the AWS API Gateway and your lambda functions to create a serverless API.
In order to get started, you just need to install the serverless framework CLI. On a Mac you can do this with the following:
curl -o- -L https://slss.io/install | bashOnce you’ve got the CLI installed, just open a terminal and run serverless and follow the onscreen prompts.
You can use the CLI for the majority of your tasks, but you can also use a serverless account for more features.
If you’d like a more detailed walkthrough, check out the serverless getting started page.
What a Serverless project looks like
When building a Serverless project, you can scaffold your own or use one of the quickstarts. I’ve found it easier to start with one of their examples. If you’d like to see all of the examples in their GitHub repo check it out at https://github.com/serverless/examples.
As I mentioned in the intro, I created a sample project to showcase how this works. My project was originally one of the example projects, and I just modified it as I built my application.
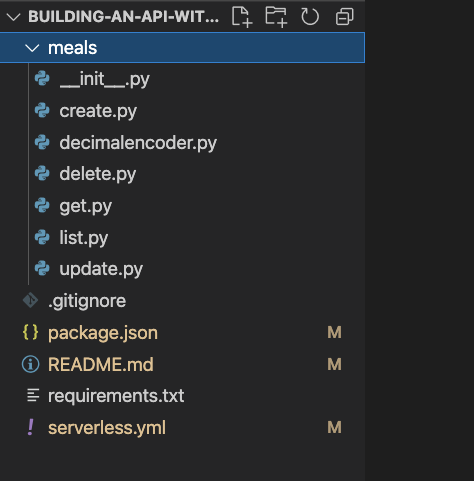
The basic project structure requires a package.json file and a serverless.yml file.
The package.json file is just to pull in some npm dependencies that the CLI will use when packaging the project. The serverless.yml file is what the CLI reads to figure out how to package the project.
In my sample project, I’ve got python Lambda functions for basic Create Read Update Delete (CRUD) operations for meals. Here is the serverless.yml file from my project:
service: building-an-api-with-serverless
variablesResolutionMode: 20210326

frameworkVersion: ">=1.1.0 <=2.33.1"
configValidationMode: error
provider:
  name: aws
  region: us-east-1
  runtime: python3.8
  stage: prod
  environment:
    DYNAMODB_TABLE: ${self:service}-${opt:stage, self:provider.stage}
  iamRoleStatements:
    - Effect: Allow
      Action:
        - dynamodb:Query
        - dynamodb:Scan
        - dynamodb:GetItem
        - dynamodb:PutItem
        - dynamodb:UpdateItem
        - dynamodb:DeleteItem
      Resource: "arn:aws:dynamodb:${opt:region, self:provider.region}:*:table/${self:provider.environment.DYNAMODB_TABLE}"
  apiGateway:
    shouldStartNameWithService: true
  lambdaHashingVersion: 20201221

functions:
  createMeals:
    handler: meals/create.create
    events:
      - http:
          path: meals/create
          method: post
          cors: true

  listMeals:
    handler: meals/list.list
    events:
      - http:
          path: meals/list
          method: get
          cors: true

  getMeals:
    handler: meals/get.get
    events:
      - http:
          path: meals/get
          method: post
          cors: true

  updateMeals:
    handler: meals/update.update
    events:
      - http:
          path: meals/update
          method: put
          cors: true

  deleteMeals:
    handler: meals/delete.delete
    events:
      - http:
          path: meals/delete
          method: delete
          cors: true
          authorizer: ${self:provider.environment.LAMBDA_AUTHORIZER}

resources:
  Resources:
    MealsDynamoDBTable:
      Type: "AWS::DynamoDB::Table"
      DeletionPolicy: Retain
      Properties:
        AttributeDefinitions:
          - AttributeName: username
            AttributeType: S
        KeySchema:
          - AttributeName: username
            KeyType: HASH
        ProvisionedThroughput:
          ReadCapacityUnits: 1
          WriteCapacityUnits: 1
        TableName: ${self:provider.environment.DYNAMODB_TABLE}
Lets look at how its structured.
The first section is giving it a service name with a setting for variable resolution (letting the CLI know how to resolve variable names):
service: building-an-api-with-serverless
variablesResolutionMode: 20210326
The second section defines the provider, framework (in this case its python) as well as IAM role statements for the lambdas. These roles are important because it allows the lambdas the rights in your AWS account to interact with Dynamo for the CRUD operations. There is also an environment variables section to define the name of our Dynamo DB instance:
frameworkVersion: ">=1.1.0 <=2.33.1"
configValidationMode: error
provider:
  name: aws
  region: us-east-1
  runtime: python3.8
  stage: prod
  environment:
    DYNAMODB_TABLE: ${self:service}-${opt:stage, self:provider.stage}
  iamRoleStatements:
    - Effect: Allow
      Action:
        - dynamodb:Query
        - dynamodb:Scan
        - dynamodb:GetItem
        - dynamodb:PutItem
        - dynamodb:UpdateItem
        - dynamodb:DeleteItem
      Resource: "arn:aws:dynamodb:${opt:region, self:provider.region}:*:table/${self:provider.environment.DYNAMODB_TABLE}"
  apiGateway:
    shouldStartNameWithService: true
  lambdaHashingVersion: 20201221
We next define the lambda functions we will be building:
functions:
  createMeals:
    handler: meals/create.create
    events:
      - http:
          path: meals/create
          method: post
          cors: true

  listMeals:
    handler: meals/list.list
    events:
      - http:
          path: meals/list
          method: get
          cors: true

  getMeals:
    handler: meals/get.get
    events:
      - http:
          path: meals/get
          method: post
          cors: true

  updateMeals:
    handler: meals/update.update
    events:
      - http:
          path: meals/update
          method: put
          cors: true

  deleteMeals:
    handler: meals/delete.delete
    events:
      - http:
          path: meals/delete
          method: delete
          cors: true
If you notice, the yaml for these functions basically just gives the function a name, defines where the lambda handler is in your project, gives the function an HTTP route, method, and if you are allowing CORS:
createMeals:
  handler: meals/create.create
  events:
    - http:
        path: meals/create
        method: post
        cors: true
With regards to the handlers, if you notice it’s pointing to meals/create.create. This is telling the serverless CLI to go to the meals folder and the create.py python file. Then within that file it is saying use the create function. This is what the create.py file looks like:
import os
import json
import logging
from meals import decimalencoder
import boto3
import traceback
import time
dynamodb = boto3.resource('dynamodb')

initialMeals = [
    {
        "day": "0",
        "breakfast": "",
        "lunch": "",
        "dinner": ""
    },
    {
        "day": "1",
        "breakfast": "",
        "lunch": "",
        "dinner": ""
    },
    {
        "day": "2",
        "breakfast": "",
        "lunch": "",
        "dinner": ""
    },
    {
        "day": "3",
        "breakfast": "",
        "lunch": "",
        "dinner": ""
    },
    {
        "day": "4",
        "breakfast": "",
        "lunch": "",
        "dinner": ""
    },
    {
        "day": "5",
        "breakfast": "",
        "lunch": "",
        "dinner": ""
    },
    {
        "day": "6",
        "breakfast": "",
        "lunch": "",
        "dinner": ""
    }
]

def create(event, context):
    response = {}
    try:
        # select data
        data = json.loads(event['body'])
        # reference table
        table = dynamodb.Table(os.environ['DYNAMODB_TABLE'])

        # if username not in body then raise exception
        if 'username' not in data:
            logging.error("Validation Failed")
            raise NameError("username is not provided")

        timestamp = int(time.time() * 1000)

        # create initial set of meals and then return
        item = {
            'username': data["username"],
            'meals': initialMeals,
            'createdAt': timestamp,
            'updatedAt': timestamp,
        }

        # write the todo to the database
        table.put_item(Item=item)

        response = {
            "statusCode": 200,
            "headers": {'Access-Control-Allow-Origin': '*'},
            "body": json.dumps(item['meals'],
                                cls=decimalencoder.DecimalEncoder)
        }
    except NameError as nameError:
        nameBody = str("Name error: {0}".format(nameError))
        response = {
            "statusCode": 500,
            "headers": {'Access-Control-Allow-Origin': '*'},
            "body": nameBody
        }
    except:
        errorBody = traceback.format_exc()
        response = {
            "statusCode": 500,
            "headers": {'Access-Control-Allow-Origin': '*'},
            "body": errorBody
        }

    return response
With regards to CORS, if you notice the response includes:
"headers": {'Access-Control-Allow-Origin': '*'},This is so that the response can pass the “preflight checklist” that comes with any application that consumes your API. I found this a little difficult the first time I worked with serverless because I had to workthrough various CORS errors connecting an API to a frontend application I built. This is documented on the serverless website, but I think this configuration is all you need to get past CORS. Obviously you can lock down your application to specific domains as well.
The last section of the yaml file is to define resources. This is where you would define things like your DynamoDB table name:
resources:
  Resources:
    MealsDynamoDBTable:
      Type: "AWS::DynamoDB::Table"
      DeletionPolicy: Retain
      Properties:
        AttributeDefinitions:
          - AttributeName: username
            AttributeType: S
        KeySchema:
          - AttributeName: username
            KeyType: HASH
        ProvisionedThroughput:
          ReadCapacityUnits: 1
          WriteCapacityUnits: 1
        TableName: ${self:provider.environment.DYNAMODB_TABLE}
Building your handlers
So the way you define the handlers for your AWS lambdas is pretty much the same way that you would if you were building with the console. I shared the create.py file above, but here’s the get.py file:
import os
import json
import logging
from meals import decimalencoder
import boto3
from boto3.dynamodb.conditions import Key
import traceback
dynamodb = boto3.resource('dynamodb')

def get(event, context):
    response = {}
    try:
        # select data
        data = json.loads(event['body'])
        # reference table
        table = dynamodb.Table(os.environ['DYNAMODB_TABLE'])

        # if username not in body then raise exception
        if 'username' not in data:
            logging.error("Validation Failed")
            raise NameError("username is not provided")

        result = table.query(
            KeyConditionExpression=Key('username').eq(data["username"])
        )

        response = {
            "statusCode": 200,
            "headers": { 'Access-Control-Allow-Origin': '*' },
            "body": json.dumps(result['Items'],
                            cls=decimalencoder.DecimalEncoder)
        }
    except NameError as nameError:
        nameBody = str("Name error: {0}".format(nameError))
        response = {
            "statusCode": 500,
            "headers": { 'Access-Control-Allow-Origin': '*' },
            "body": nameBody
        }
    except:
        errorBody = traceback.format_exc()
        response = {
            "statusCode": 500,
            "headers": { 'Access-Control-Allow-Origin': '*' },
            "body": errorBody
        }

    return response
As you can see you define an event and context which is then used by the lambda. This is pretty well documented by AWS, so I’m not going to go into much discussion past this. The general point is that you just define your handlers and then reference them in the severless yaml file. When you’re ready to deploy, the serverless CLI packages them all up and deploys them for you.
Deploying your project to AWS
So once you’ve built your API, now you can go ahead and deploy it. As I mentioned before, the Serverless CLI uses your AWS credentials to deploy your project. You’ll need to setup the AWS CLI before you can deploy your project. Once you’ve done that, open a terminal and go to the project and run serverless deploy to see it in action.
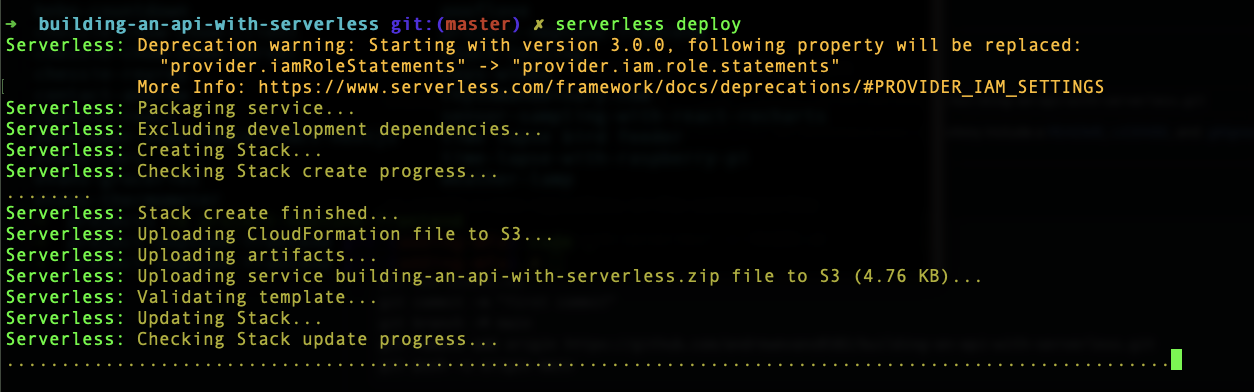
When it’s finished creating your project, you should see something like the following:
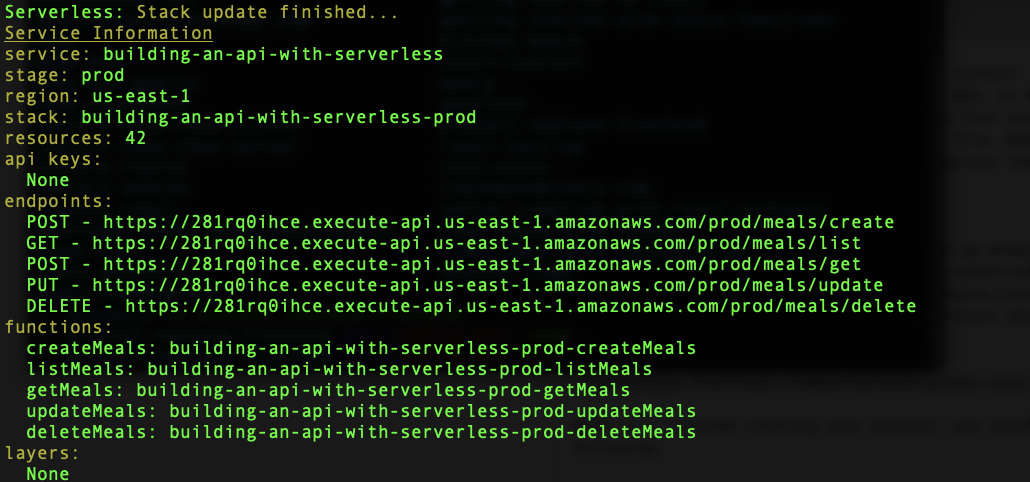
If you notice, the last message gives you a set of endpoints that correspond to your functions. If you notice, they all have the same base URL because they are hosted with the AWS API Gateway. So they’re all routes within a single project.
You can take the endpoints and hook them up with postman and see the result:

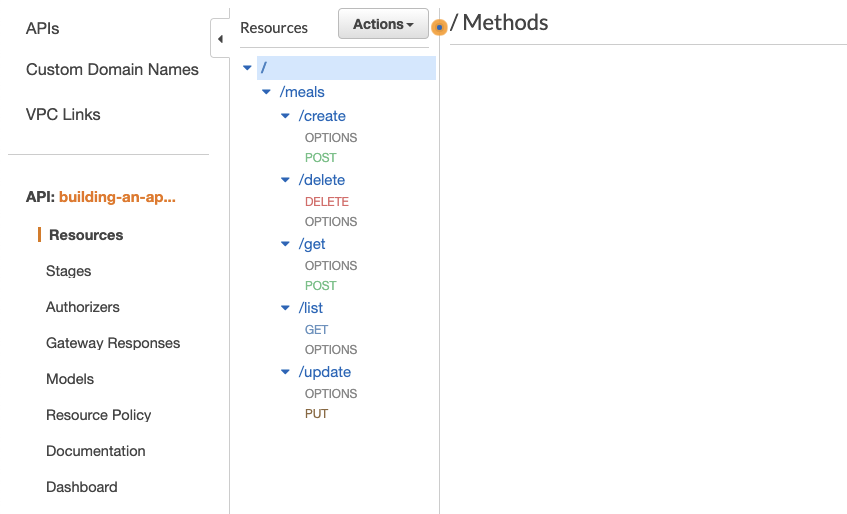
If you go into the AWS console, you can look at what was created. Here is the routes in the API Gateway:
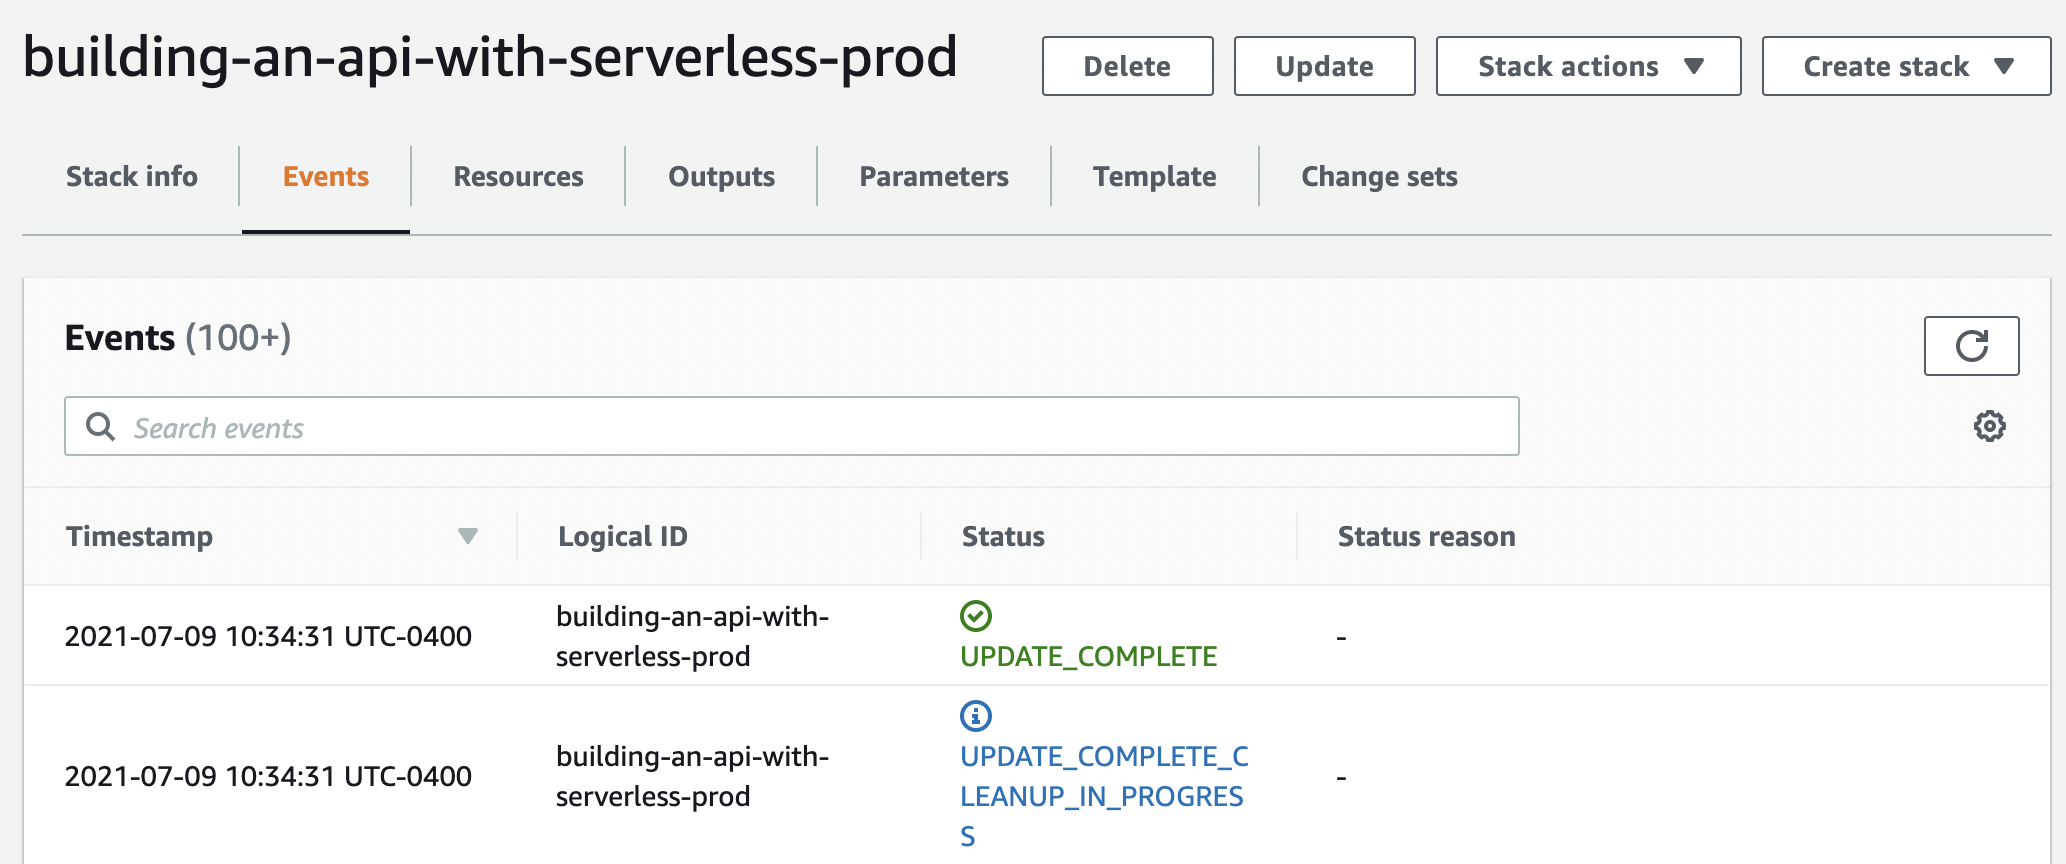
You can also see the stacks in the Cloud Formation Templates in the AWS console:
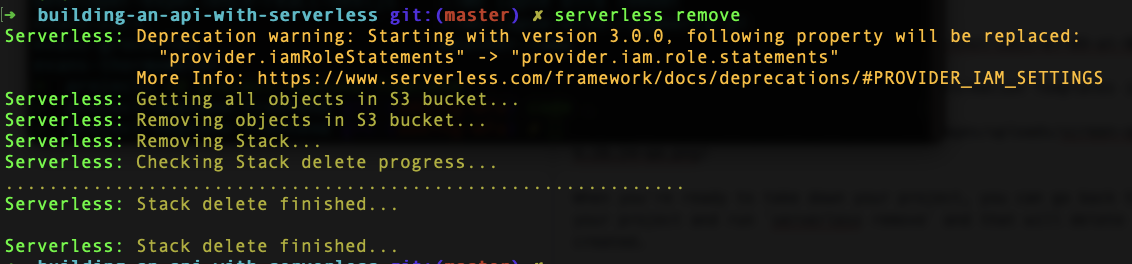
When you’re ready to take down your project, you can go back to your terminal at your project and run serverless remove and that will delete the stack that was created.
Closing Thoughts
I hope you’ve enjoyed this post, and possibly learned something about the serverless framework in the process. I’ve used the serverless framework for several projects and had a good experience. It is pretty well documented, and there are a lot of examples that help you get started. A few other cool things you can do with the serverless framework include creating environments (we only created a “PRD” environment in the example) as well as setting up cron jobs and more. I encourage you to check out the serverless framework documentation page to learn more.