
Getting Started with React Remix
I’ve recently been seeing a lot about React Remix and wanted to take some time to learn about it. This post is going to cover how React Remix works and some basics for getting started. In this post, I’ll be going over how I built a fan site for the popular book series and netlifx show Shadow and Bone. This was a fun project that uses some of the features of React Remix and was a great way for me to get some experience with it.
If you want to go ahead and look at the finished site, check it out at shadow-and-bone-page.netlify.app. You can also see the source code for the site at shadow-and-bone-page2.
What is React Remix?
React Remix originally came with a paid subscription. Teams would buy subscriptions, and then get access to the source code etc. This past November, React Remix became open sourced and can be accessed at https://github.com/remix-run/remix.
React Remix was built by the same folks that work on the React Router. It has several React optimizations that make it easier to build apps quickly. Applications that are scaffolded with the Remix CLI follow a standard convention (folders for Routes and styles etc.). React Remix also leverages hooks in its Routes that allow Server Side Rendering (SSR). This means that data fetching is built into each route, and makes developers lives easier through leveraging the React Remix hooks in lieu of things like useEffect etc. The great part of React Remix is that it supports all the things that you love about React, so even with these new hooks you can still build in the behaviors that you have grown to love.
The way that React Remix handles data fetching also connects nicely to “edge computing” concepts. This is particularly apparent in Content Delivery Networks (CDNs) and Serverless functions. CDNs host static resources and also cache responses. Having different CDNs in different regions globally improves performance because frequent requests do not have to go through all of the hops to get to the server every time. Serverless functions (AWS Lambdas for example) take this even further with caching and other performance enhancements from cloud providers. Building an application with React Remix, one can leverage the performance of a CDN with the built in hooks for SSR.
React Remix is super new, but there is a lot of great potential for its future. The React Remix site has a nice set of docs along with several example apps that help you get started.
My example application

As I mentioned in the intro, I have built a fan site for the popular Shadow and Bone series. If you want to check out the finished site, check it out at shadow-and-bone-page.netlify.app. You can also see the source code for the site at shadow-and-bone-page.
The backend for this site is a set of AWS lambdas that you can read more about in my post Building a AWS Serverless Node Express API.
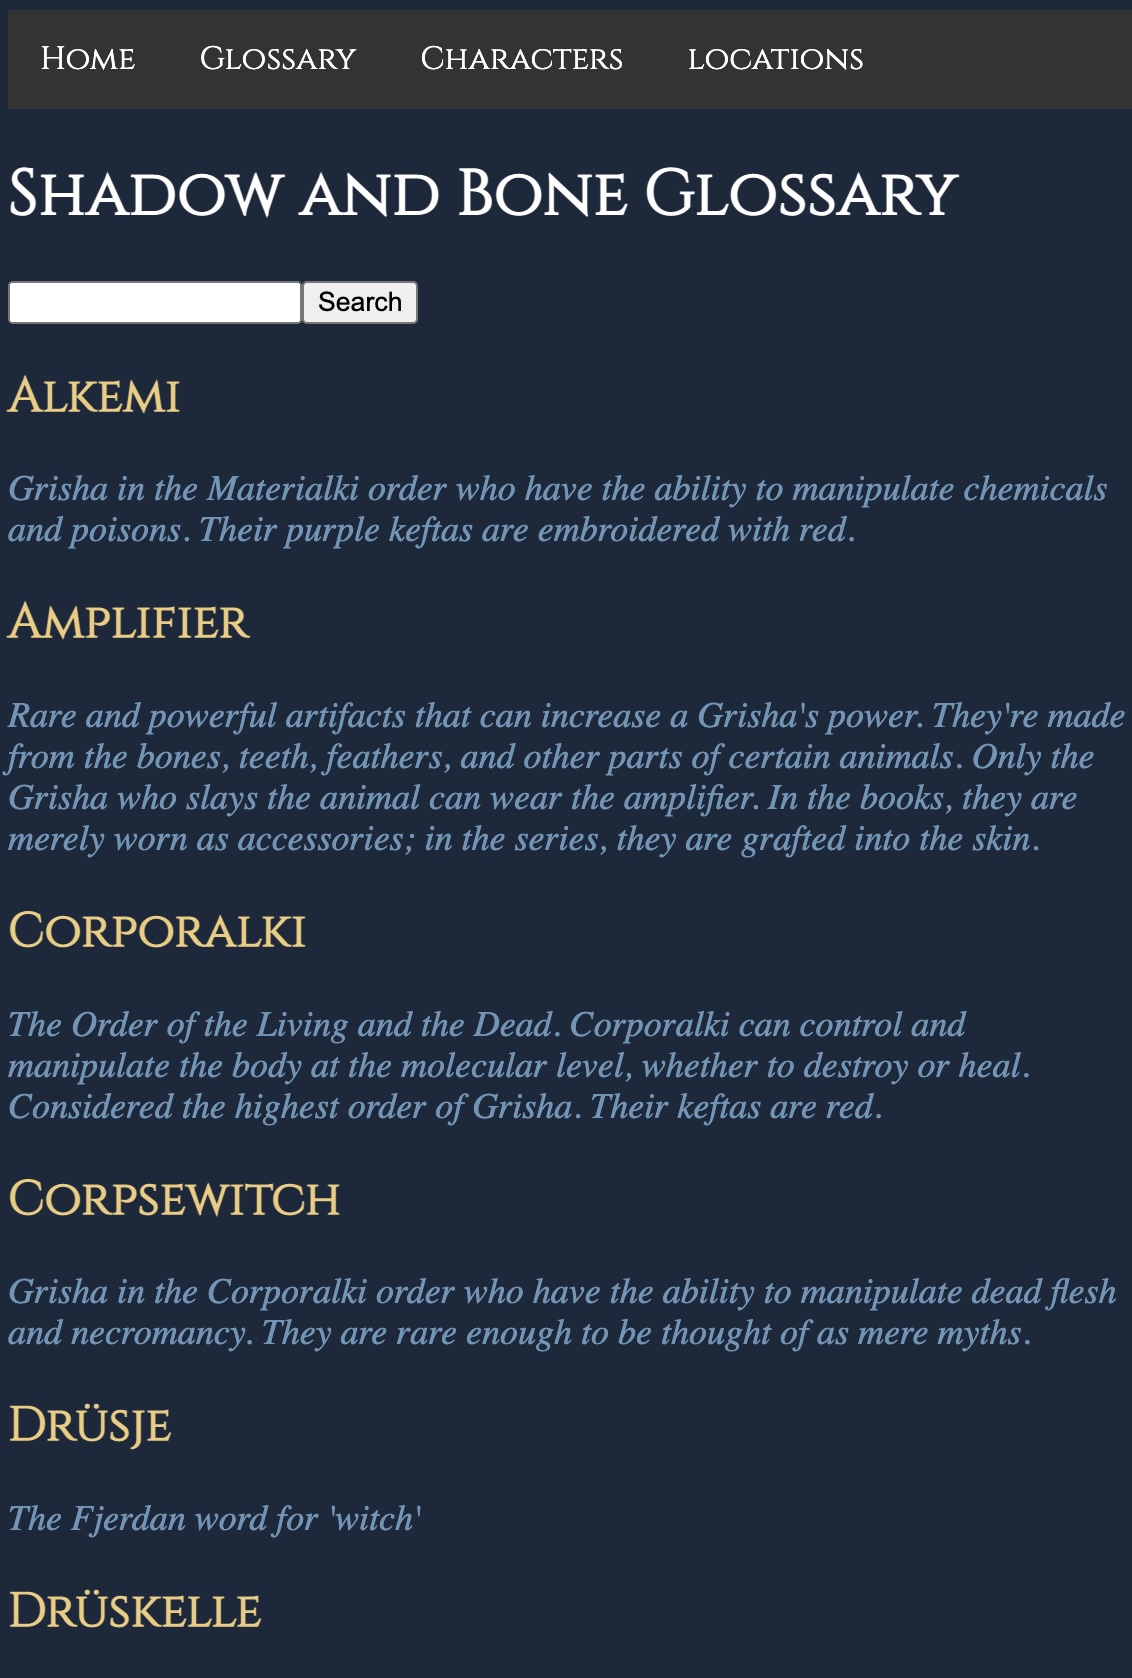
The project is pretty simple, and basically just shows a quick reference for terms, characters, and locations from the books.

There is also a search feature built into each page. This doesn’t do anything fancy, but just leverages event handlers to filter what is shown.
Some basics about React Remix
If you look at my sample project, you’ll see a standard React Remix application. The folder structure looks like the following:
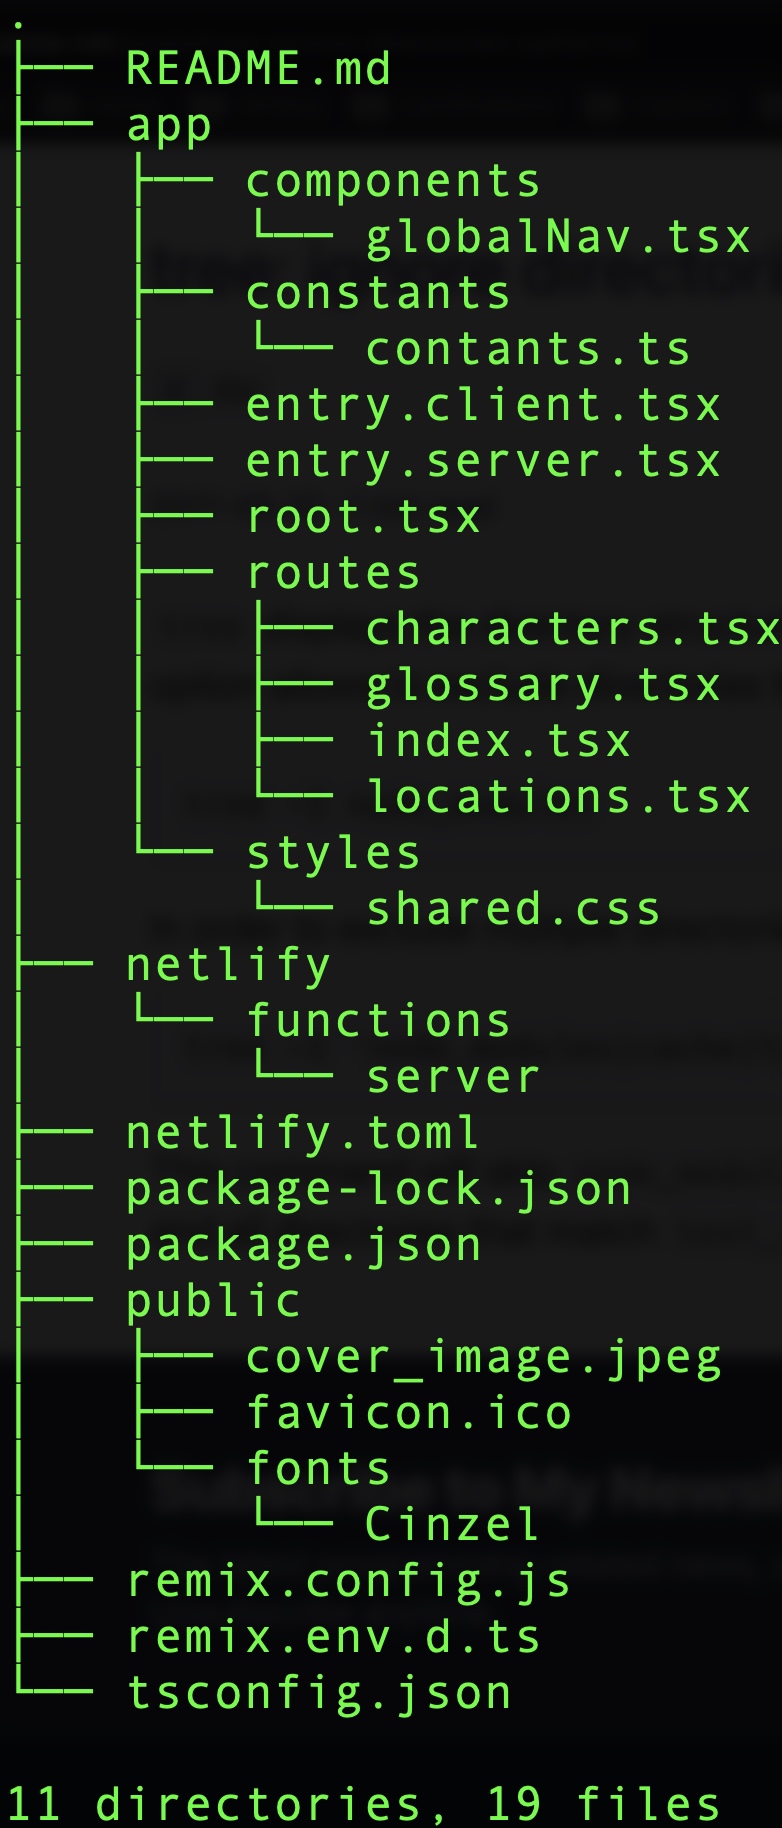
The app folder houses the usual React things including folders for routes and styles. The public folder has assets like images and fonts, and is also where the build artifacts go. If you notice I have a netlify folder as well. My project is using Netlify for hosting, but you could just as easily do this with other cloud providers (check out the React Remix deployment docs for more). You’ll also notice a remix.config.ts file that is used for your apps configuration. The CLI does most of the work in that config file, but you can manually modify it as well.
There are more things that you an do depending on how you build your app. The official React Remix getting started page covers those in their quickstart page.
Using the built in hooks
As I mentioned in the intro sections, my app is basically just pages of information for glossary, locations, and characters in the book series. To retrieve those, I have a set of Lambdas hosted on API Gateway for the different endpoints.
To achieve this in the different components, I followed the pattern you see here:
import { Outlet } from 'react-router';
import GlobalNav from '~/components/globalNav';
import { useLoaderData } from 'remix';
import { redirect } from 'remix';
import axios from 'axios';
import { SERVER_BASE } from '~/constants/contants';
import { useState, useEffect } from 'react';

export async function loader(request: any) {
    try {
        const response = await axios.get(
            `${SERVER_BASE}/shadow-and-bone-server/list/characters`
        );
        return response.data.values;
    } catch (err) {
        console.error(err);
        redirect('/');
        return {};
    }
}

export default function Characters() {
    const data = useLoaderData();

    const [finalValues, setFinalValues] = useState([]);

    const [searchValue, setSearchValue] = useState('');

    useEffect(() => {
        setFinalValues(data);
    }, []);

    const filterValues = (e: any) => {
        e.preventDefault();

        if (searchValue === '') {
            setFinalValues(data);
        } else {
            const filteredOutput = data.filter((value: any) => {
                const searchUpper = searchValue.toUpperCase();
                const nameUpper = value.name.toUpperCase();
                if (nameUpper.includes(searchUpper)) {
                    return true;
                } else {
                    return false;
                }
            });
            setFinalValues(filteredOutput);
        }
    };

    return (
        <>
            <GlobalNav />
            <h1>Shadow and Bone Characters</h1>
            <form>
                <input
                    name="search"
                    type="text"
                    value={searchValue}
                    onChange={(e: any) => {
                        setSearchValue(e.target.value);
                    }}
                />
                <button type="submit" onClick={(e) => filterValues(e)}>
                    Search
                </button>
            </form>
            <section>
                {finalValues !== [] &&
                    finalValues.map((value: any) => (
                        <article key={value.name}>
                            <h2>{value.name}</h2>
                            <div>{value.description}</div>
                        </article>
                    ))}
            </section>
            <Outlet />
        </>
    );
}
If you notice, I have a loader function which is called when the page loads. The data object that is defined with the useLoaderData() function from Remix is used by the component to present the results. The route does a GET request to the route /characters and then loader function is executed calling the Lambda and getting back the payload. To make things simple, I made the event handler for search leverage useState and just parse the payload based on what was entered. This is a great example how using React concepts is super easy with Remix.
This is just doing a GET request, but React Remix also works with POST requests for things like forms etc. Just copying from the quickstart page:
import { useActionData, Form, redirect } from "remix";
import type { ActionFunction } from "remix";

export const action: ActionFunction = async ({
  request,
}) => {
  const formData = await request.formData();

  const title = formData.get("title");
  const slug = formData.get("slug");
  const markdown = formData.get("markdown");

  const errors = {};
  if (!title) errors.title = true;
  if (!slug) errors.slug = true;
  if (!markdown) errors.markdown = true;

  if (Object.keys(errors).length) {
    return errors;
  }

  await createPost({ title, slug, markdown });

  return redirect("/admin");
};

export default function NewPost() {
  const errors = useActionData();

  return (
    <Form method="post">
      <p>
        <label>
          Post Title:{" "}
          {errors?.title ? (
            <em>Title is required</em>
          ) : null}
          <input type="text" name="title" />
        </label>
      </p>
      <p>
        <label>
          Post Slug:{" "}
          {errors?.slug ? <em>Slug is required</em> : null}
          <input type="text" name="slug" />
        </label>
      </p>
      <p>
        <label htmlFor="markdown">Markdown:</label>{" "}
        {errors?.markdown ? (
          <em>Markdown is required</em>
        ) : null}
        <br />
        <textarea id="markdown" rows={20} name="markdown" />
      </p>
      <p>
        <button type="submit">Create Post</button>
      </p>
    </Form>
  );
}
If you notice the action function does the same thing that we saw with the loader function. Basically your form will call the action when you click submit. It’s also cool because you can easily pull in form data directly from an instance of the form. If you notice the form component is actually <Form> since that is the one that comes with React Remix. The React Remix <Form> component has some cool optimizations including the ability to have transitions. If you’d like to learn more, I recommend checking out the docs on the transition state.
Wrapping up
I hope you’ve enjoyed this post, and learned some about React Remix in the process. The features that I covered can all be see in the sample apps and docs on the React Remix GitHub project and website. I recommend checking them out and also just playing with this yourself. As I mentioned, I used Netlify for my project but you could just as easily leverage something like a deployment with AWS S3 and a Cloudfront CDN.