
Building a Blog with Astro
This week I finished writing my new blog site here at andrewevans.dev. I decided to write it with astro and wanted to share what I did and some things I learned a long the way. In addition to this post, I recommend checking out the astro getting started docs for more.
What is Astro?
At a high level astro is a static site generator. What makes it unique is that it does “partial hydration” of the output HTML, CSS, and JS files that compose a bundle. This basically means that the output mostly consists of static content that is highly performant in web browsers, and clientside JavaScript only runs where it’s needed. This is different than other static site generators because instead of having JavaScript throughout the application, it is only present where clientside interaction is required.
Under the hood, astro also uses Vite for packaging and building the project. This enables a very performant and quick feedback loop when doing development.
Astro’s docs describe this approach as a Multi-Page Application (MPA) instead of a Single Page Application (SPA). The idea being that instead of having JavaScript handle the page transitions, etc. the site rendering is handled server side wherever possible. So each page is an HTML request that is served from something like a Content Delivery Network(CDN). Serving HTML is a definite performance gain vs compiled JavaScript that rerenders the DOM in place like is done with other frameworks. The other big thing about the way this works is that the runtime is JavaScript, so there’s no need for tooling like Ruby, PHP or others. So if you’re a developer and familiar with HTML, CSS, and JS then you can get going very quickly with an astro project.
Another feature that makes astro powerful is the concept of “Islands.” Taking an image from the astro docs:
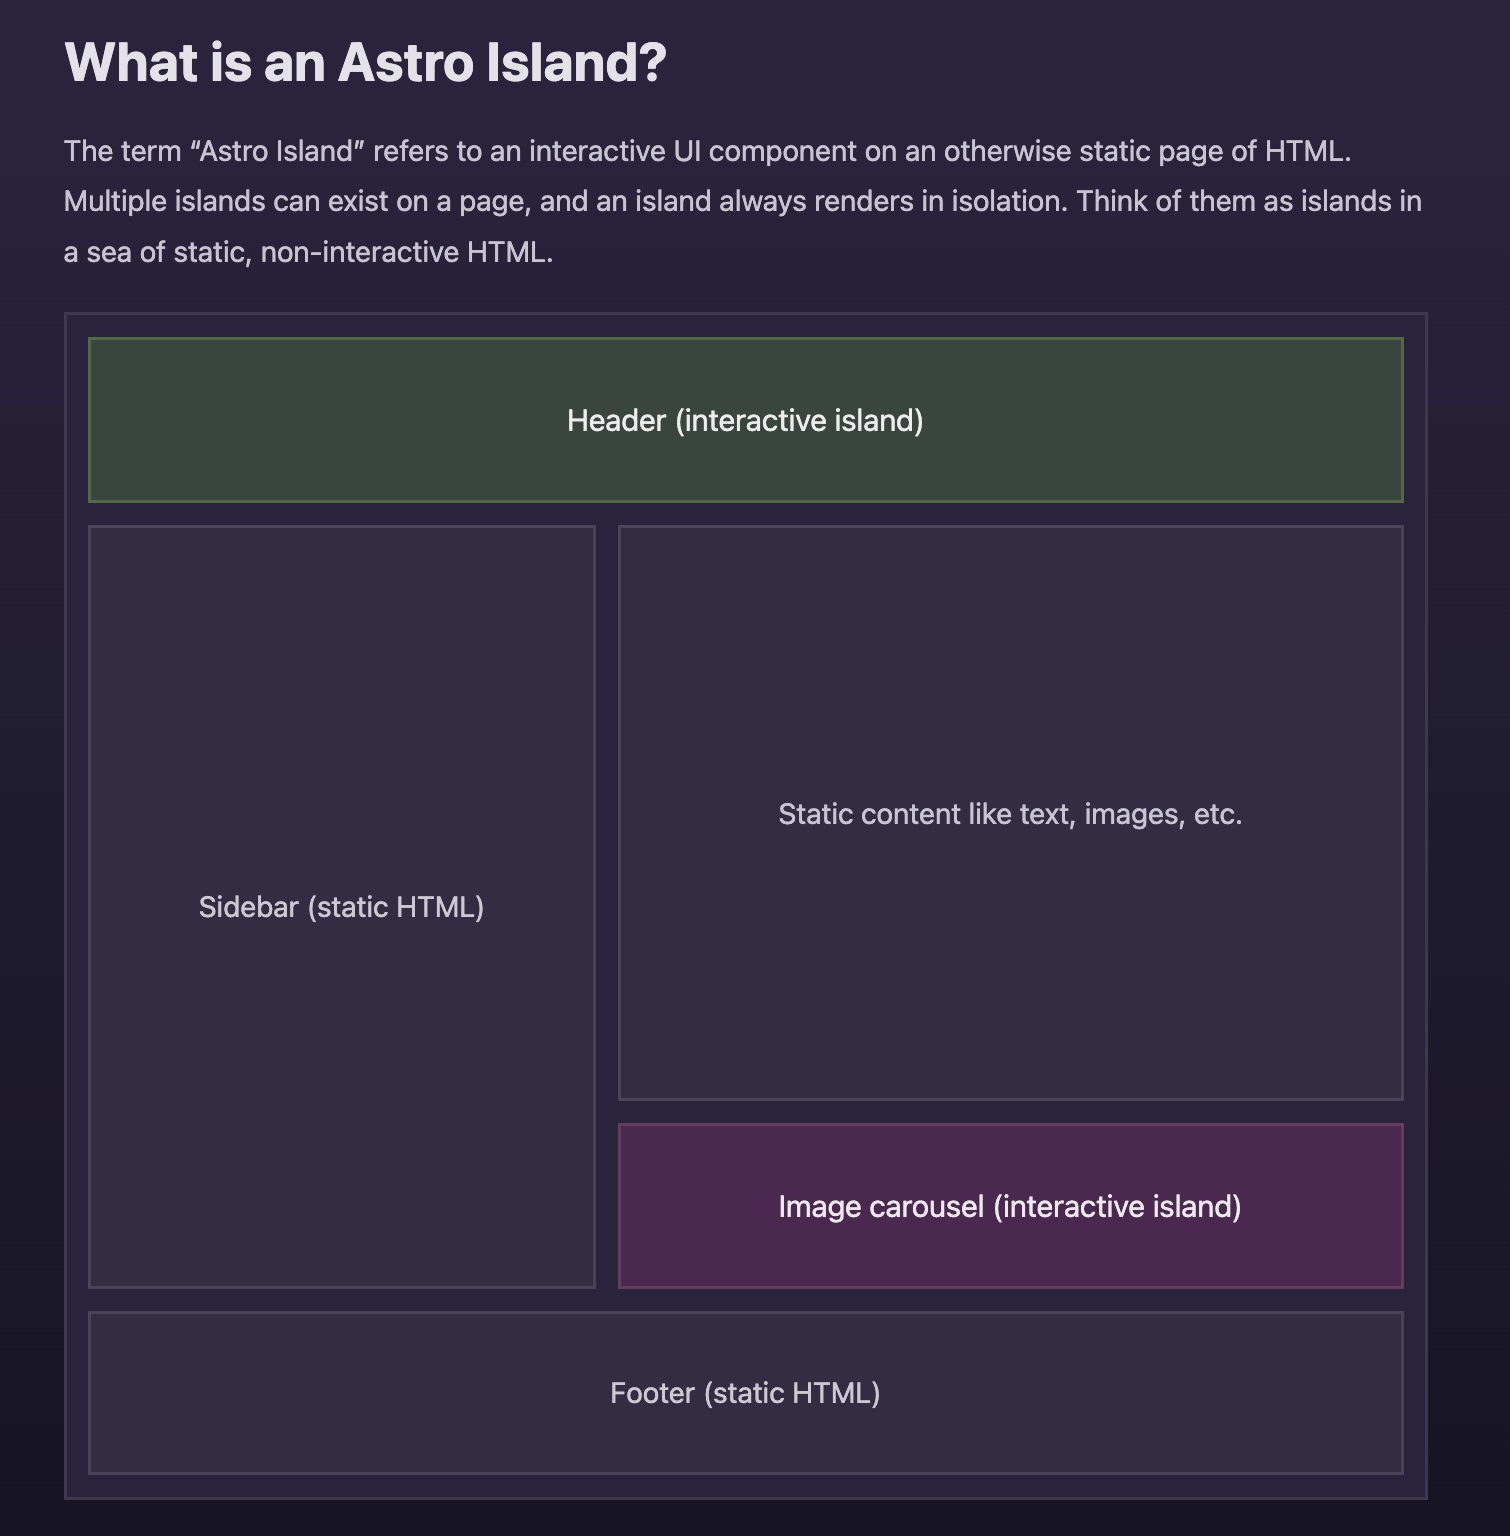
The idea is that the components are encapsulated so that you can generate a site with components from different Frameworks or Libraries like React, Svelte, and Vue…but all in the same project. Astro has packages it uses for integrations of these different Frameworks and Libraries, and you just import those into your project.
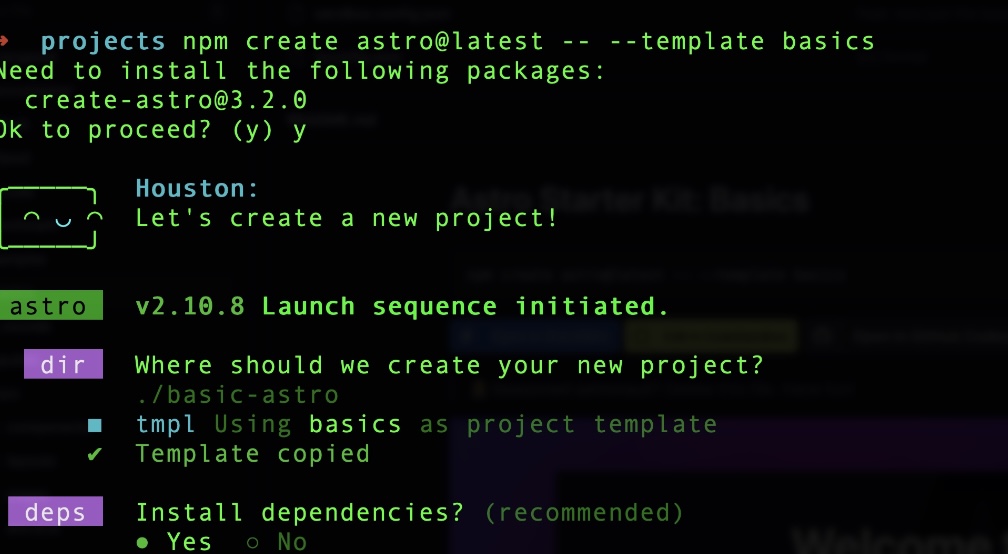
To get started building with astro, just go to astro.build and use one of the starter templates. You could also use one of the various npx commands to generate a new site fresh with a template like the following:
Astro Features and Project Layout
Astro includes a file based routing approach.
Other features include support for:
- Sitemap generation
- RSS generation
- Markdown to HTML conversion (Frontmatter)
- PWA support
- Service Workers
- Much more
In astro, most of these features are considered “integrations” and you can pull them into your project with the astro.config.mjs file:
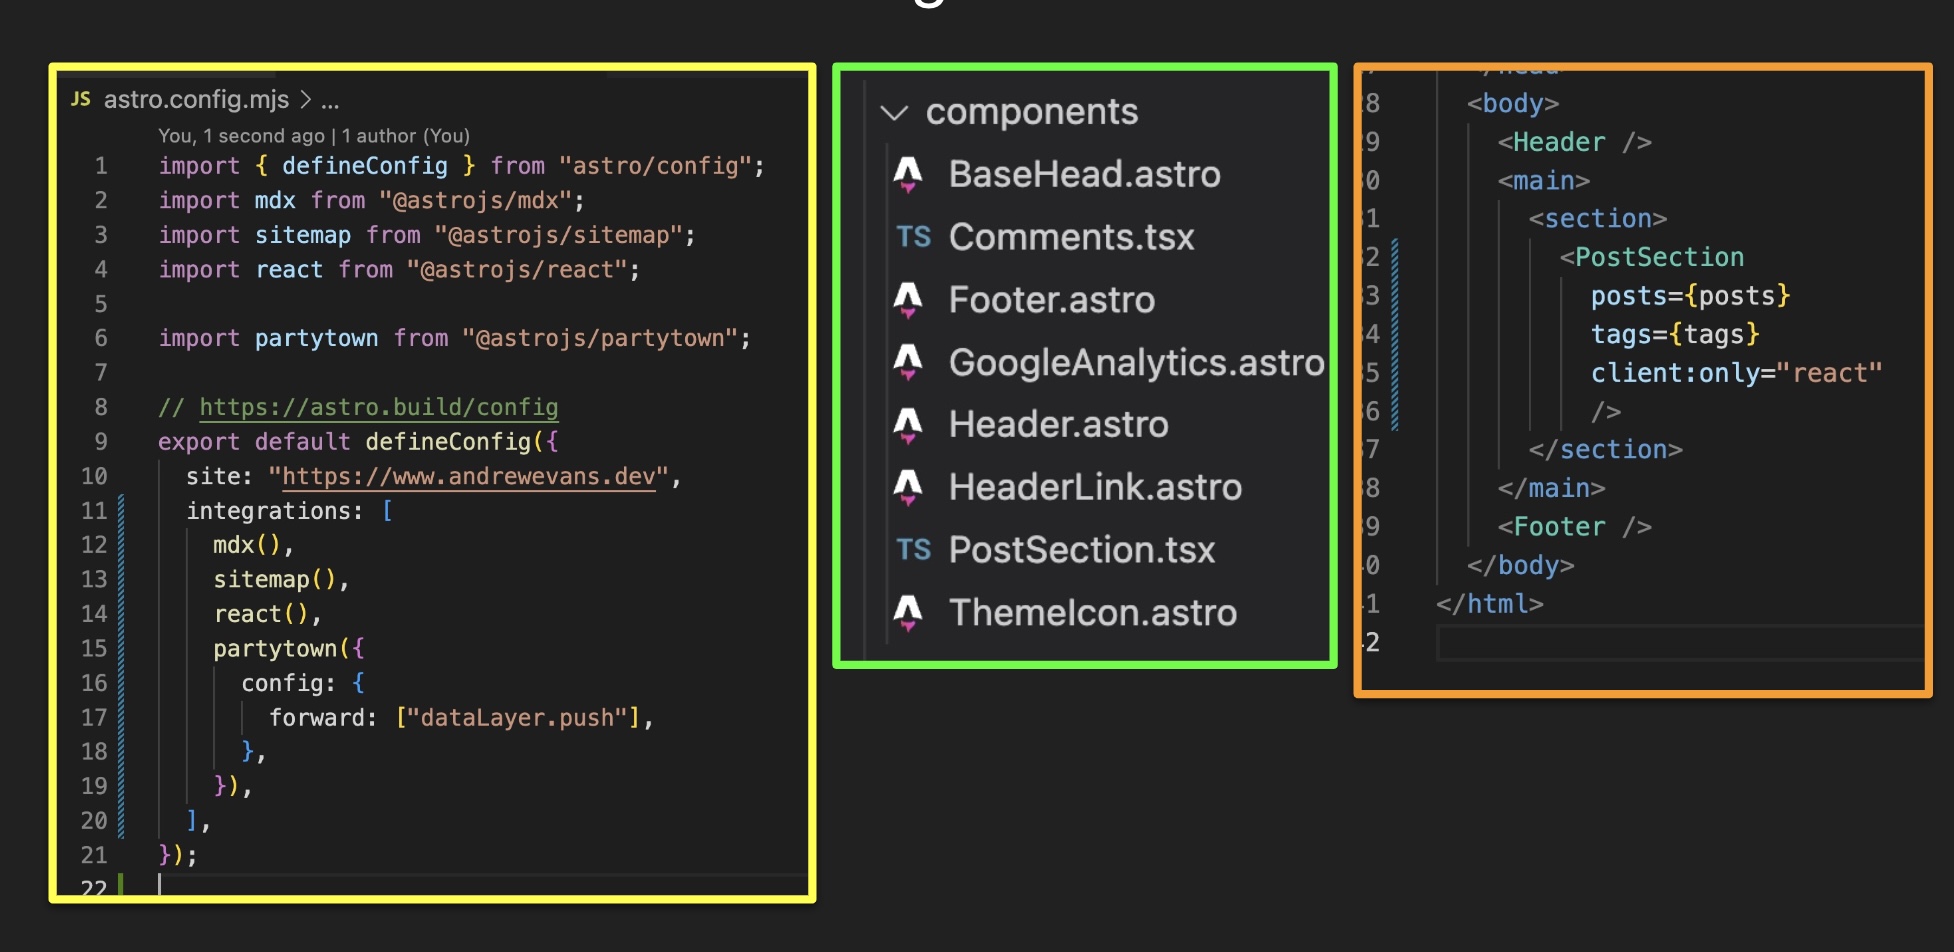
In this picture you see on the left the config file, in the middle are components (note the .tsx and .astro components alongside each other), and to the right is an astro component that includes a React component that runs clientside (note the use of client:only="react"). When you put client:only"react" it tells the bundler that this is a component that will need to render on the client. There are several variations of ways you can turn on clientside interaction in the astro docs. So the resulting output will include JavaScript where this component is.
The structure of astro projects is very similar to a traditional React, Vue, or Svelete project with a public folder for assets and a src folder for your components.
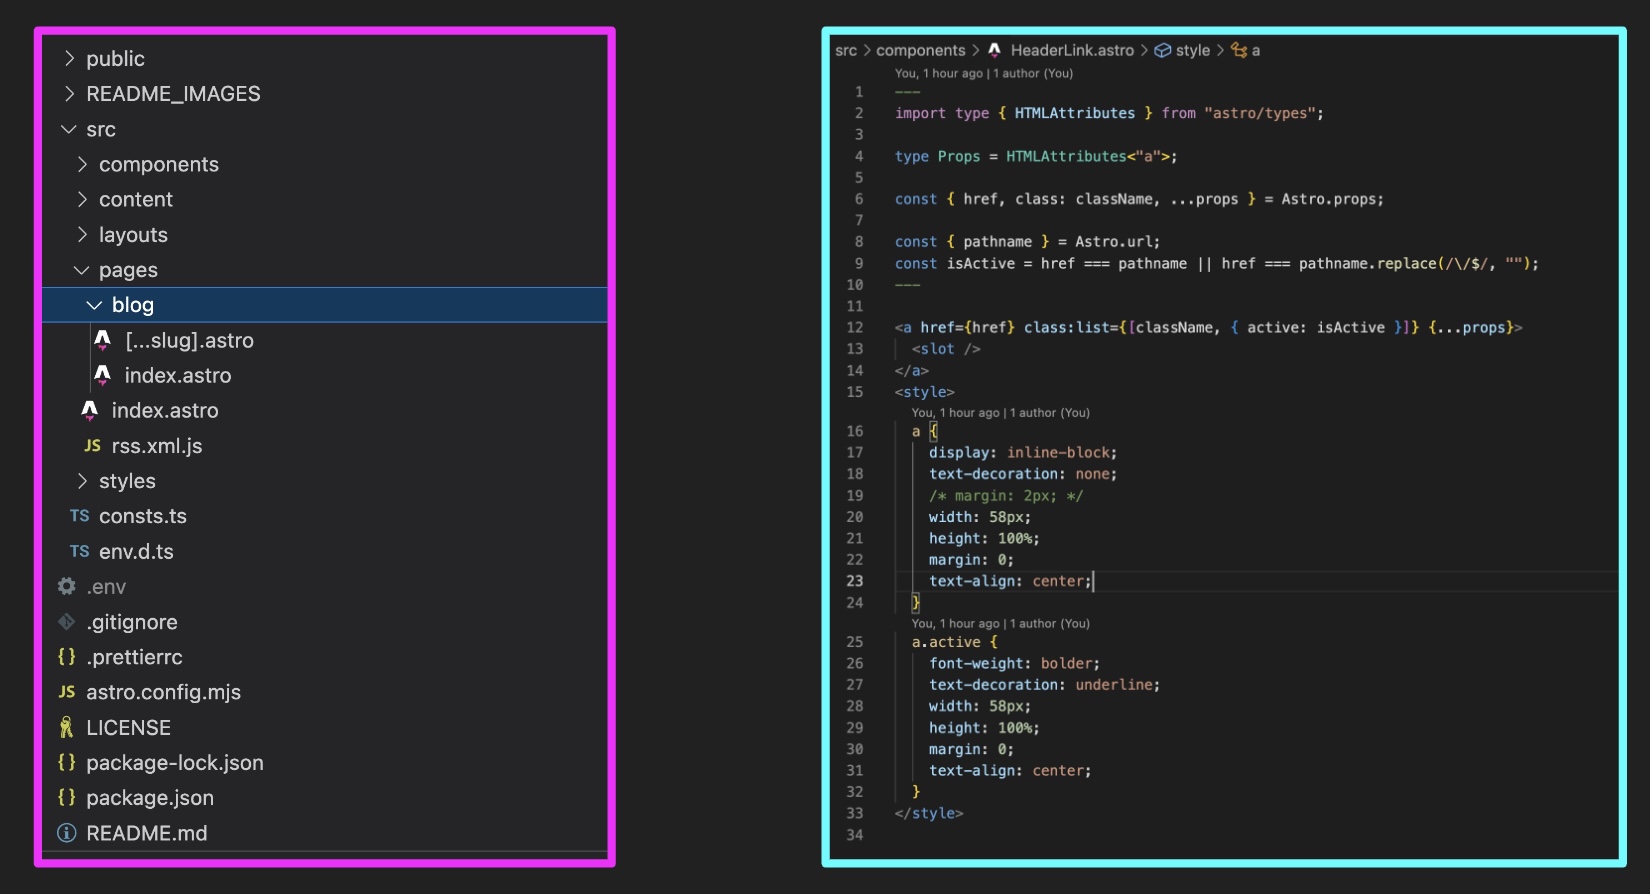
You’ll note on the left is the project and the right is an astro component. The components have a section for importing components and creating local variables, then a “view” area for your HTML and even a section for CSS. The way astro components are organized is considered “frontmatter” and is similar to the way you would outline a markdown file.
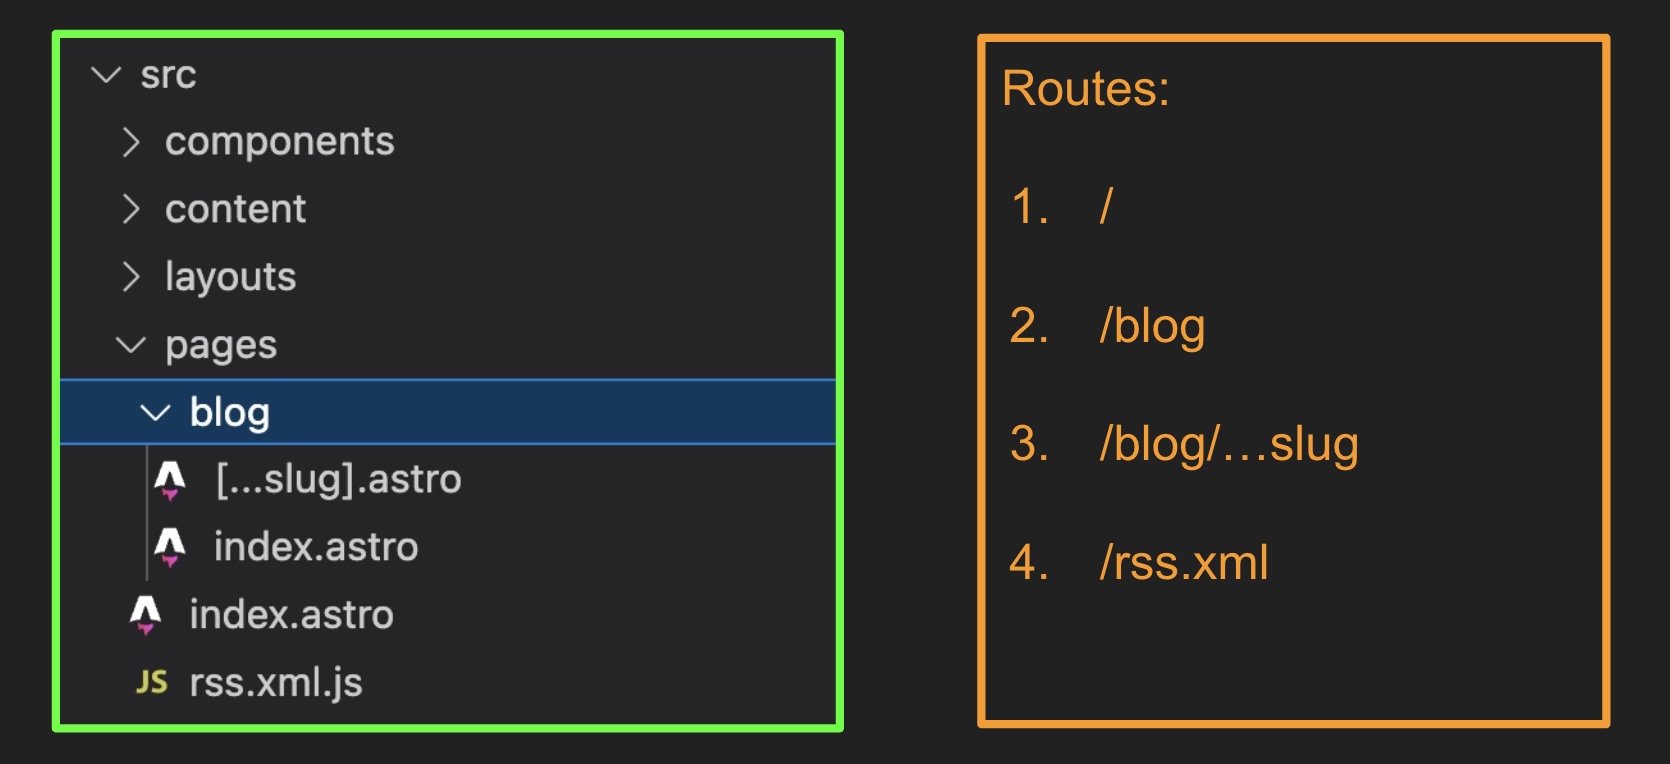
When the project is built, the pages end up looking like the following:
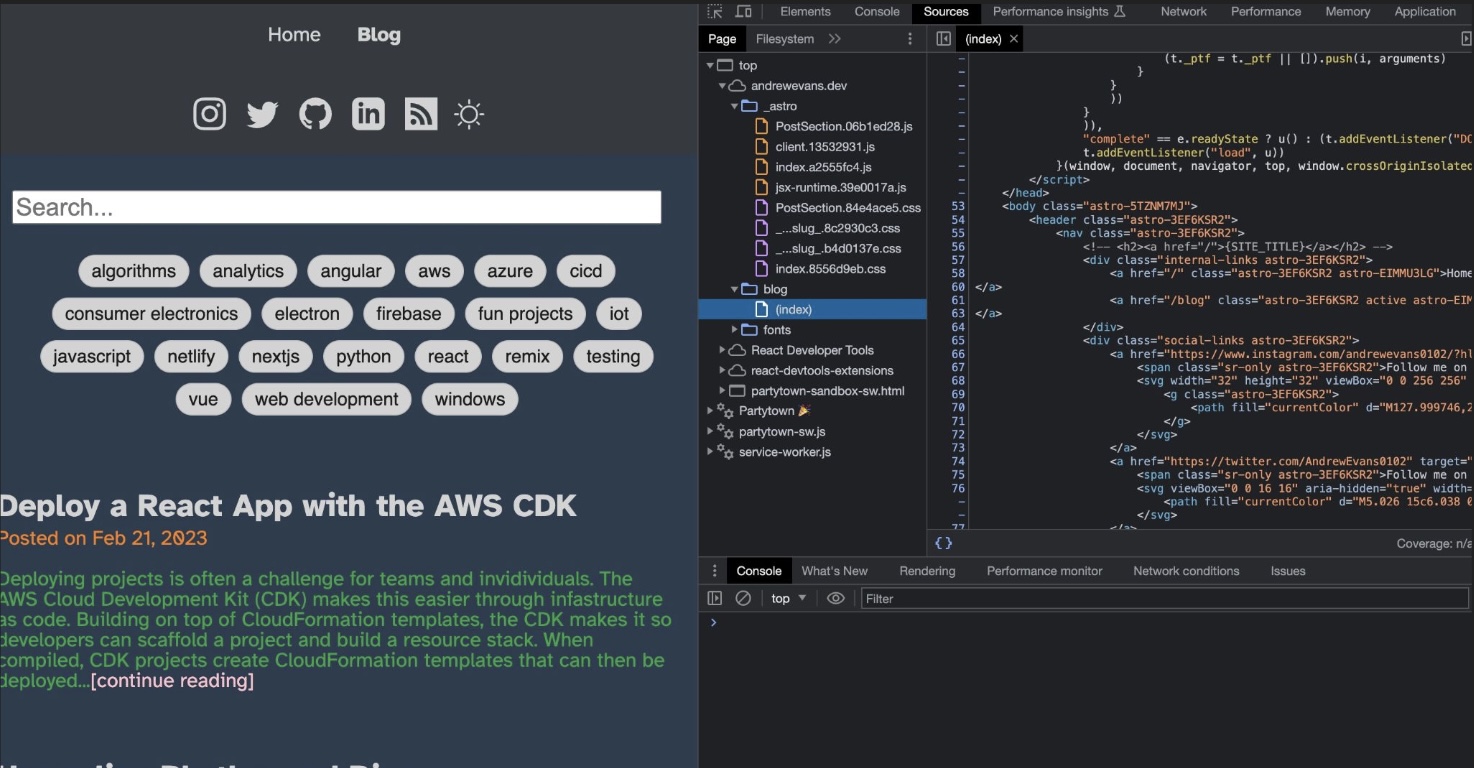
In this picture you’ll note that in the source files the “blog” folder has a index file which is what you would expect with any HTML page. The included JavaScript bundling under the “astro” folder is to include the React component that is in the middle of the page displaying the list of blog posts. Otherwise, it’s just the static HTML, CSS, fonts, and any images.
Generating Markdown from HTML Files
A lot of static site generators boast about the ability to convert markdown files into HTML. There are several different npm packages that can accomplish this. With astro, it is super easy as you just:
- create a
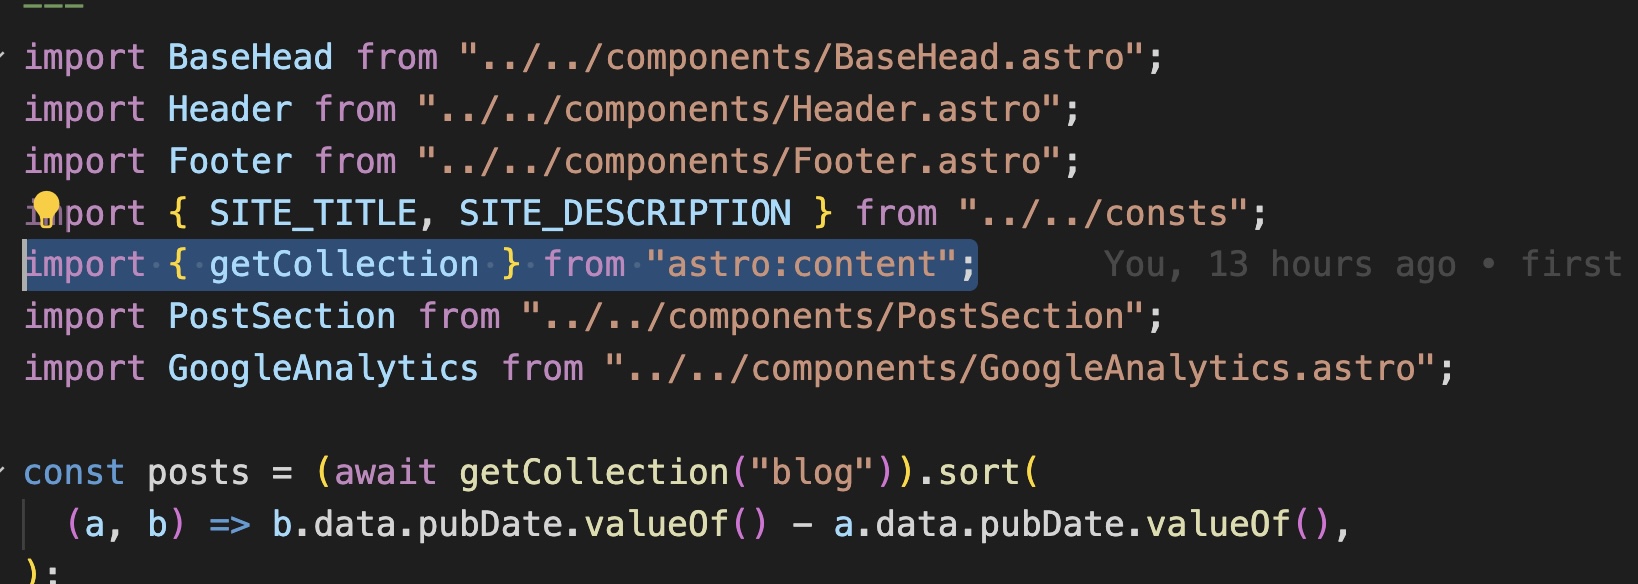
src/content/blogfolder and put any markdown files there - add an import to
getCollectionfrom theastro:contentpackage - call the
getCollectionfunction and pass in theblogsince that’s the name of the folder insrc/content - then pass the values retrieved by
getCollectioninto child components
It should look something like this:
In the pages that actually display the content, you call a render method that will then do all the work for you:
---
import { CollectionEntry, getCollection } from 'astro:content';
import BlogPost from '../../layouts/BlogPost.astro';

export async function getStaticPaths() {
	const posts = await getCollection('blog');
	return posts.map((post) => ({
		params: { slug: post.slug },
		props: post,
	}));
}
type Props = CollectionEntry<'blog'>;

const post = Astro.props;
const { Content } = await post.render();
---

<BlogPost {...post.data}>
	<Content />
</BlogPost>
I also used this same getCollection function to pull out values for tags that I could use in navigation of my project:
const tags = [...new Set(posts.map((post) => post.data.tags).flat())].sort();Generating RSS
In previous projects, generating an RSS feed was fairly difficult as you would have to generate it line by line. With astro this is super easy as you just add a rss.xml.js file to your “pages” folder with something similar to the following:
import rss from "@astrojs/rss";
import { getCollection } from "astro:content";
import { SITE_TITLE, SITE_DESCRIPTION } from "../consts";

export async function get(context) {
  const posts = await getCollection("blog");
  return rss({
    title: SITE_TITLE,
    description: SITE_DESCRIPTION,
    site: context.site,
    items: posts.map((post) => ({
      ...post.data,
      link: `/blog/${post.slug}/`,
      description: `About ${JSON.stringify(post.data.tags)}`,
    })),
  });
}
This uses the same getCollection function that you saw used to generate the markdown files in the earlier section. However, this time the output is then parsed and the rss object from the @astrojs/rss package does the work of actually generating the output. The end result is an /rss.xml route that users can hook into for your RSS feed.

Closing Thoughts
I hope this post has helped you to get a better understanding of astro and the cool things you can build with it. Building andrewevans.dev was a great exeprience, and I was able to utilize a lot of the features I’ve shared here. I stared with the vercel astro starter blog, and then iteratively made changes to properly style it and pull in several integrations. All of this was pretty straightforward and easy to follow. The astro documentation also includes a tutorial and several examples which really helped the development process. Once I had the site setup, I then just migrated over the markdown files from my previous site and made a few editoral changes along the way.
I would highly recommend checking out astro for your next project. The documentation was super helpful, and there is a fair amount of community support. Everytime I had an issue, I was usually able to google it or find an example in a GitHub repo (usually linked from the main astro page). The performance has also been awesome as I found great lighthouse scores when it was finished. The folks working on astro are also active, and it’ll be exciting to see what they do next.